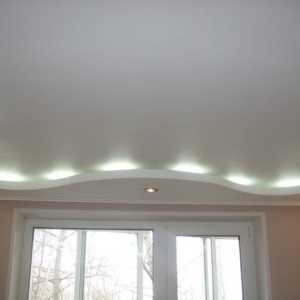
Plasterboard is a rather popular finishing material, which is used at the final stage of wall decoration, ceilings. It is easy to install, makes it possible to get different configurations (multi-level) ceiling, allows you to find a perfectly smooth surface. But still plasterboard requires putty to remove small irregularities, masking of seams and screws that were used for fastening sheets.
1
Before starting work, let's get used to the new conditions. Typically, experts recommend to give it to him days 20. Then spend the preparatory work before starting putty. Speakers are climbing with a screwdriver or screwdriver.
2
Prepare the following materials and tools:
primer;
putchal finish;
sherryanka;
the spatula is wide and narrow;
roller;
rule;
ladder;
a mixer or drill with a nozzle;
capacity for mixing putty.
3
To prepare the ceiling to putty, a primer is used, which allows the layer of putty to dry and stick stronger. Using a roller or tassels, apply primer on the ceiling, paying special attention to the joints and places of fastening. After primer, plasterboard becomes more moisture-resistant and acquires a firm surface. Let dry the primer day.
4
In the deep container, pour water and, stirring with a mixer, gradually pour dry putty until the consistency is thick.
5
Take a narrow spatula to putty on the seam, filling out all empties. Move first along the seam, and then across. Remove excess putty and let dry the layer. On top of the sheplicated seam, stretch the self-adhesive grid and apply the solution again. It is also necessary to handle the holes of the screws. Start the next stage after 24 hours.
6
Apply a putty to a large spatula with a small spatula and gradually stretch it on the surface. Try to do everything quickly so that the solution is not drying, and there were no cracks. After covering a significant area, level the work with the rule moistened in the water. Excessive solution can be put in the container.
7
Apply the finish putty only after a complete starting start. You may have to wait a few days. If the ceiling is white, it means that the layer is completely dry. For quick and complete drying, you can open windows and doors. In this case, the rule for wallpaper does not work - the absence of drafts.
8
The finishing putty is also performed by a wide spatula, but this layer should be thinner. Apply the solution to the working spatula and stretch it to yourself. Thus, treat the entire ceiling. Formed narrow stripes, irregularly squeeze.
9
After drying the finish layer, we proceed with the surface of the surface with a grinding grater. We do it until the ceiling becomes perfectly smooth and matte. When grinding, be sure to wear safety glasses and respirator.
That's all, the ceiling of plasterboard is ready for further finishing work. The perfectly aligned surface can be primed, and then paint or glue the wallpaper.
Share advice:"How to put the ceiling of plasterboard"