Old and uneven ceilings do not like anyone. Many owners do not pay attention to this or scared such work by virtue of its inconvenience, and in vain, because the overlap could not look aesthetic even with an expensive finish. If you thought about it, but do not know how to do it better, take advantage of our advice on how to level the ceiling.
Preparation of the foundation
Alignment of the ceiling surface is starting to dismantle the old finishing material. If there are various defects on the basis, be it cracks, chips, pits, you need to close them. In addition, do not forget to clean the ceiling and cover the primer composition of deep penetration to harden the upper layer and improve the adhesion indicator. At this stage also determine the value of the surface of the surface, depending on which the method of alignment is chosen. This is done using the level: find the lowest angle in the room and measure the distance to the floor, the difference of the ceiling itself is determined.

Spacure ceiling alignment
The minimum difference that is up to 1 cm is eliminated by putting out:
- The first layer should be thick, when applied to the solution, strive to reduce the difference to zero, but not trying to achieve the perfect smoothness of the surface.
- After leaving the ceiling so that it is missing - about 1-2 days.
- At the next stage, the primer of the base is performed, which also needs drying. This requires about a day.
- Then there is a turn of the second layer, which is created using the finish fine putty. It is applied by a thin layer - no more than 0.5 mm.
- The coating is again sucked.
- After the ceiling is driving, the surface is open with fine-grained emery paper until smoothness. You can also use the polymer leveling grid.
- It remains to brand the ceiling again and wait for him to be.

Application of reinforcing grid
If the height of the ceiling surface is greater than 1 cm and reaches 2 centimeters, it will not work out with one spacion solution. A thick layer of putty simply will not hold on, peeling and dropping afterwards. You can do differently: do small layers, wait until they dry, not forgetting the need for the primer of each of them. But this is very long, and the reinforcing mesh, made of polymer material, comes to the rescue. For its attachment use special glue. After mounting the grid, the ceiling is left to dry and act further according to the method described above, starting with clause 3.

Leveling ceiling plaster
With a drop of 2-5 cm, the spacing mixture is not able to cope, it is necessary to resort to the use of plaster:
- The ideal option will be the use of rotband gypsum plaster.
- Prepare the surface to alignment, it should be proceeded to create a reinforcing frame. For this, a metal mesh will be used. Installation is carried out using brackets, carnations or screws. You can also glue the ceiling to reinforce the polymer grid.
- We proceed to plastered the surface. Since the maximum layer thickness is 2 cm, they make 2 layers of plaster.
- If, after applying plaster, the differences remain, align them with putty.
- Each layer before creating the next should dry well, after which it is necessarily ground.
- To smooth out formed on the basis of flaws, skill the finishing layer and cover the primer.

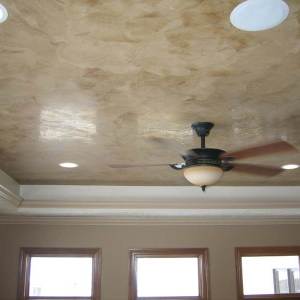
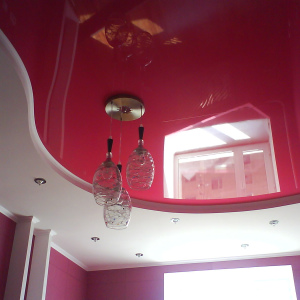
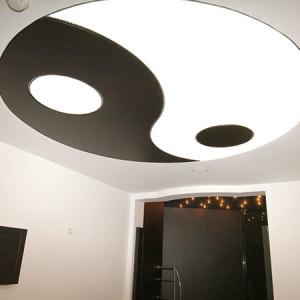
Suspended and stretch designs
If the ceiling drop exceeds 5 cm, "wet" methods are powerless, a special design should be created. Technologies are quite diverse, you can recreate the wheels, panel, mirror, cassette, mirror, stained glass or stretch ceiling. The installation of such a design does not require long-term preparatory work, but it is necessary to close the ceiling defects and it is necessary to prevent its upper layer in the future. The main advantages are that the design removes any irregularities and ceiling drops, provides the ability to mask communications, electrical wiring, ventilation channels
The universal version of the ceiling alignment is the use of drywall:
- First, it is necessary to determine the difference in the base, using the laser level, and apply the mark on the walls.
- At the next stage, set the label the frame system, fixing the dowel to the wall. The design of the frame is selected, depending on the design of the ceiling: a simple, multi-level, combined with a tensionable web or glass system.
- Next, it is necessary to consider the ceiling lighting system and bring power to the sites where the lighting devices are planned, since this space will be watched by the GLC without the possibility of accessing it.
- Plasterboard sheets are attached to the frame using self-tapping screws.
- The seams that were formed between them, put off and strengthen the sickle ribbon, like hats of self-tapping and any irregularities that arose in the process of mounting drywall.
- Then you should turn the entire ceiling surface and polish the sandpaper.
- At the final stage, the ceiling is painted.
Read more about creating a ceiling of plasterboard can be read in our article " How to seize the ceiling by plasterboard».

Thus, there are many ways to align the ceiling: the use of putty, the use of reinforcing mesh together with a spacing mixture, aligning the plaster or the creation of a suspension or stretch structure, among which a special place is occupied by the surface covering procedure with plasterboard sheets. Choose what you like more!