How to seize the ceiling by plasterboard

How to seize the ceiling by plasterboard

The covering of plasterboard sheets allows you to hide defects and make the ceiling of the desired configuration. The technology of making a suspended design considered here is available for sale with their own hands.

1
Focusing on the ceiling sizes and adding about 5% to "stock", the desired number of plasterboard sheets is calculated. For mounting the frame will be needed:

  • The guide profiles of a depth of 27 mm - their total length is equal to the ceiling perimeter;
  • The ceiling profiles for jumpers are mounted in a step of no more than 60 cm;
  • Crabs for each site of the junction of the guides;
  • Suspensions - installed after 1 m;
  • Anchor for fixing the metal base and self-tapping screw for mounting drywall;
  • Fiberglass tape and putty.

Tools for work:

  • Perforator, screwdriver;
  • Scissors for metal, Bulgarian;
  • Level, roulette, cord;
  • Knife, hacksaw;
  • Plane;
  • Putty knife;
  • Sandpaper.

PHOTO-1.

2
When a multi-level design device creates a diagram that displays all the little things: box, niches and bends. A simple single-level ceiling is placed using a level right away. Marking starts from the lowest corner of the room. Horizontal lines are conducted on top of the walls at a distance of 80-100 mm from the ceiling or more to accommodate engineering systems. With proper markup, the initial and final boundary will comply at one point. Next, the links of the joints and the placement of the crossbar are designed, striving to maximize the use of whole sheets and reduce waste. Placement operations finish checking evenness and horizontality.

Photo-2

3
The first profile guide are installed: the dowel-nails are fixed after 350 mm. According to the previously drawn lines, the suspensions are mounted, which will require at least 3 pcs. For one profile. To accommodate longitudinal guides, cord or laser level are used. The end of the profile is introduced into the groove, the height is exposed on the stretched twine and is fixed with a self-tapping screw in the suspension. Cut transverse framework elements and fixed with crabs. After assembling the carrier frame, the wiring is paved, and in the case of use for lighting heavy chandeliers, supporting points are prepared in the form of wooden bars.

Photo-3.

4
Getting started with plasterboard, performed according to certain rules:

  • When working in the room should be dry and heat (not lower than 15 ° C);
  • Sheets are disintended so that the joints fall on the profile framework of the frame;
  • Cutting on a straight line is made with a knife, followed by dummy and cutting from the reverse side;
  • Complex grooves and cutouts are cut off with hacksaw, the holes for the lamps are dried;
  • The edges of the sheets are removed by the plane at an angle for high-quality filling with putty;
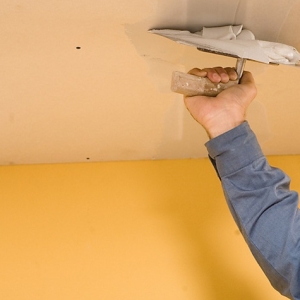
  • The mount is carried out by self-tapping screws with 1-2 mm heads;
  • The distance between the screws is 150-200 mm, and the edge of the drywall - 25 mm;
  • The twisting effort is controlled to avoid material breaks.

Photo-4.

5
The fixed plasterboard is grounded, large slots are filled with putty. Then the reinforcing ribbon is punctured joints and put off again. The dried surface is grouped by the sandpaper, is processed with soil. It remains to make the final finish - paint or pasting decorative materials.

Photo-5.

Figure forms of the crushed structures require bending of drywall, for which there are two technologies: "dry" and "wet". The provided video will help to understand in detail in the intricacies of the process.

Add a comment

Your e-mail will not be published. Mandatory fields are marked *

close