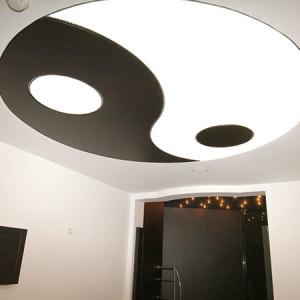
The apartment has a lot of places where the box of plasterboard can be useful: a bathroom and a toilet, a living room and even a balcony. In the bathroom and bathroom, the box will help hide engineering communications that cannot be transferred for security reasons and thoughtfulness process. In the living room using such a design you can give a more interesting view of the beams of overlapping or supporting beams, as well as make several ceiling levels. On the balcony, the box can be simultaneously both a box for storing household smallers, and a worktop. At the same time, the cost of buying consumables will be pleasantly surprised. The design itself is very simple, but there are several technical moments that will allow you to make your box durable and aesthetic.
1
For Manufacture of gypsum cabarton you will need:
Screwdriver;
Drill C. perforator;
Level, plumb, corner, ruler;
Roulette;
Selfless I. dowel;
Hammer;
Clerical knife;
Metal profile;
Plasterboard;
Mineral wool.
2
One of the most important points in any construction work is the correct markup. It is necessary to take into account the sizes of facing materials. If there is a tile on top of a plasterboard, then it is advisable to consider the size of the whole tile so as not to waste time on the cutting. And the whole tile always looks more spectacular than the two of its halves. Also, refer to the presence of gaps when laying and the thickness of the drywall itself.
3
It is important to maintain a level and an acceleration in all elements of the design. It is also necessary to check all the angles with the help of a construction corner for compliance with 90 degrees. It is preferably to close all communications: riser of drain water, riser with cold and hot water, sewer, pipes. This will preserve the integrity in the design. Though according towater riser with hot water There is another opinion - it is not closed into the box so that the heat from it heated the toilet room. From the unclosed parts, we leave the output of the crane for filling bachka Toilet bowl, tooling the knee of toilet, viewing window for the meter.
4
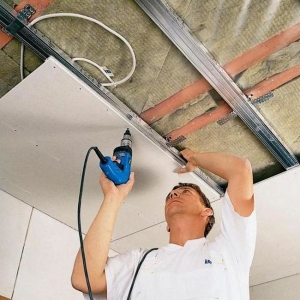
At Installation profile Use two types: UD profile and CD. –profile. From the first make up the box of the box, and with the help of the second ribsstiffness. UD profile Fastened to walls, semi or ceiling by a dowel 6 mm by 40 mm every 50 cm. However, if the wall is thin and, for example, separates the toilet with the kitchen, then the dowel can squeeze the tile on the reverse side. The rest of the CD –profile is recruited using metal screws.
5
Ribsstiffnesswhich will make the design more durable, set every 50 –60 cm. Plasterboard in the bathroom and toilet room you need to use moisture resistant, its characteristics are specifically designed for rooms with high humidity.
6
If The apartment in which you do repair is on first secondnine-story floor Buildings, the noise from the riser will deliver inconvenience. In this case, the entire space between the pipe and the framework of the profile must be filled with mineral wool: starting from the place of the combination of the knee of the toilet and closing the entire riser. Mineral wool 50 mm thick will be enough.
7
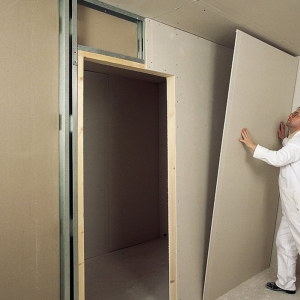
So, after installing the construction of metal products, set ribsstiffness, laying mineral wool business remains For small - preparation of plasterboard and its screwing to the frame. Applying the dimensions on the plasterboard, the stationery knife cuts the sheets. We first cut the top layer of cardboard, pressing on the knife with such an effort so as not to deepen into the gypsum. We lake the cut line at the angle of the table, the palm cotton is laid down a part, the lower layer of cardboard also cut off with a knife. The resulting part is screwed by self-drawing to the profile around the perimeter, as well as in the middle where will be ribsstiffness.
8
Joints and angles that were formed between slices of drywall when shptelsania It will be necessary to build reinforcing grid. In the future, it will avoid the appearance of cracks in gaps between tiles. What is customary to be called a box of plasterboard is ready. The final stage in the work will be applied to plasterboard tiles with subsequent grouting seams or Walking with wallpaper.
Remember that Remo nT Sun.ever requires time. Holding time for construction work, you need to add 2 –3 days by non-standard Situations: Replacing unsuitable materials, buying a blown perforator, dOOK ended self-tapping screws. In this case, the repair can be a creative process and bring pleasure.