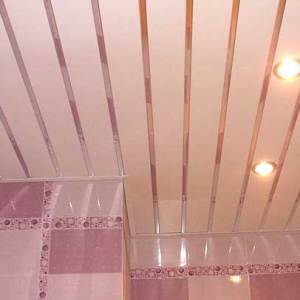
Houses of Soviet buildings are distinguished by very uneven ceilings. The easiest way to correct the defect of the ceiling is the manufacture of single-level mounted ceilings from plasterboard.
Selection of material
For the ceilings of residential rooms, purchase ordinary plasterboard sheets (for dry rooms). The ceilings in the kitchen, in the bathroom and on the loggia are made of moisture-resistant samples. The thickness of the sheets for the manufacture of the ceiling is 8-9.5 mm, they thinned with 3-4 mm walls.

Placement work
Using a hydraulic system, determine the lowest corner of the ceiling. Decide in advance, there will be a luminaire on the ceiling or not. From the lowest angle, measure 5 cm down (if there is no lamp) and put the label on the wall. If the lamp will be attached to the ceiling, put a label after 8 cm. Take the base for the database and transfer it to all the angles of the room with the help of a hydraulic level. Spend on the perimeter of the line room connecting tags. The operation can be performed using a painting cord.

Alternately attach the profile to each wall in such a way that the bottom edge coincides with the strip on the wall. Through profile openings, spend the risks of the location of the mounting holes in the wall.
Mark the ceiling of the ceiling profile location. The width of the plasterboard sheet is 120 cm, so apply the line on the ceiling after 40 cm so that the fasteners are uniformly located. Determine the location of the suspensions - elements that lock the plates to the ceiling and preventing the appearance of the leaf deflection. Return 25 cm walls, this distance will be located the first series of suspensions, put risk.

Attach the label to the label and draw the position of fastening anchors. The following rows of suspensions should be located 50 cm. Perform the holes in the markup ceiling to install the fastener.
Fastening profiles
Stick to the wall profile sealing tape. Perform holes in the wall of the labels (at least 3 on one lane) and secure the profile to the wall of the dowels. Stick to the suspension sealing tape and secure the anchors to the ceiling. Decide with the size of the ceiling profiles. Standard length of one element - 3 meters. If the room is shorter - cut off too much, if longer - buy connecting fasteners for lengthening the profile. Check the connection location is located near the suspension.

Profile Start secured from the corner of the room. Secure the profiles to the closest to the corner of the suspensions on the 4 self-press with pressshabs, controlling the lack of a provision of design. Secure the central part of the suspension. Control the horizontal structure with a long level. Similarly, fasten the adjacent profile, as well as two profiles near the opposite wall. The latter mounted medium stripes.

The length of the plasterboard sheet is 2.5 m. In places of docking of adjacent sheets, secure special elements to the ceiling (crabs) to which jumpers will be screwed. Make them from the ceiling profile and fix to crabs screws.

If necessary, warm the ceiling of mineral wool. Insulation Cut the squares of large sizes than cells on the ceiling, install in the framework.
Fastening of plasterboard
Mounting plasterboard start from the corner of the room. The first self-tapping screw out at a distance of 10-15 cm from the edge, then after 20 cm around the perimeter and in the center. Plates put with 2 mm gaps.

Sealing seams
Treat seams with primer. For sealing slots, a high-term primer is needed, specially intended for such purposes. After seelings, the seams finally perform the shp clashing of the seams by the usual finishing putty.

Plasterboard ceilings have their advantages and cons. Main positive parties - you can get the design of any design, for example, a multi-level ceiling or a design with color backlit.