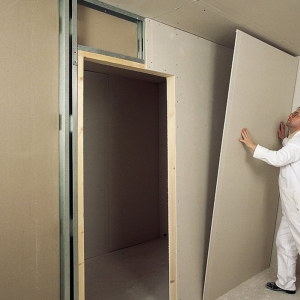
Alignment of walls is an urgent problem even for new buildings. The most common way to solve it is the use of plasterboard sheets that are mounted frame or frameless way.
It will take:
- antiseptic;
- spray;
- metal galvanized profile for GLC (UD 27 and CD 60 or UD 17 and CD 47);
- dowel;
- plasterboard sheets (wall, ceiling or moisture resistant, depending on the destination);
- screws 35 mm for GKL;
- screwdriver;
- primer for plasterboard;
- painting ribbon, finishing putty, spatula.
- around the perimeter of the wall (floor, adjacent walls, ceiling) Tick the line along which the plasterboard wall will be held so that the wall is smooth, use the level and the coal;
- online, fasten the guide profile on the ceiling and the floor with dowels, they must be parallel to each other (UD);
- set the carrier profile vertically to the guides at a distance of 40 or 60 cm, connect the combined profiles on the corners to be combined with the design, so that the design is rigid enough and did not change the form over time;
- secure the first and last profiles close to the wall, inserting them into guides;
- subsequent profile Position at a distance of 40 or 60 cm, the reference point is in the middle line of the profile, so that in the subsequent on one profile it was possible to secure 2 adjacent GCCs;
- if between the profile and the wall is a large distance, then install additionally perforated suspensions to increase the stiffness of the structure.
- prepare the desired size of the sheets of plasterboard, in the marked line, swipe in the GOC knife to cut through one side of the cardboard, then bend it in the opposite side to break the plaster, and roll the second side of the cardboard;
- screw to the profile with a screwdriver, while the distance between the screws should be 10-15 cm;
- screws should not look out from the GLC surface, they should be drowning into the surface without allowing cardboard breaking.
If the irregularities of the wall is minor, you can use the frameless method of alignment with plasterboard using special glue.


