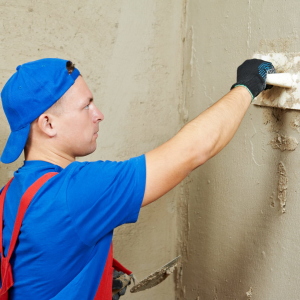
In an effort to hide from the urban world and urban fuss, our compatriots are increasingly building country wooden houses, not only as a tribute to fashion, but also as a reflection of centuries-old traditions. Designs erected from wood require a special approach, in particular to the process of alignment of the walls, as the tree is not an easy material, the structure and properties of which depend on weather conditions. In addition, over time there is a shrinkage of a wooden house. Given all this specifics, we will teach you to correctly align the wooden walls.
Our grandfathers and grandmothers for aligning wooden walls used ordinary newspapers and cardboard, but since these methods did not guarantee the duration of the finish, more modernly developed, and at the same time effective materials. Before direct alignment, you need to carefully prepare the surface. At the same time, make sure that the air in the room is dry, because it adversely affects the quality of further work. Remove the old finish from it, the plaster, get all the fastens - nails, screws and brackets, if there are cracks - close up using mounting foam. After drying the room, do not forget to treat all the wooden elements with the composition of mold, parasites and fungus. Next should be equipped with the first layer, for which it is recommended to use a chipboard. Material is easy in operation and is available at a price. Although this is by no means affecting his quality. Such a frame should be a smooth surface, use a laser level or plumb.Consider the alignment procedure for wooden walls with drywall:
- First of all, swipe the surface markup, indicating horizontal and vertical lines.
- After installing a frame from a bar, you can also use metal for this. When mounting the frame, it should be aligned using the level.
- When cutting sheets, remember that their height should be 5-10 cm less than the height of the walls. Sheets cut off shorter by about 3 cm, given the possible shrinkage at home.
- Secure sheets in a checker order to avoid the formation of transverse seams. Do not forget to do it to ensure high-quality air intake walls.
- At the floor, it is necessary to leave the unabated space, hinged it with decorative plinths.
- If in the process of mounting drywall, gaps were formed in places of docking sheets, close them with painting scotch.
- After attaching the GLC, go to the shtailet work.

- Use putty. The technique is suitable if the walls are not made from a wild church. Sprouter the surface and cover it with an antiseptic. If there are small picking and cracks, close them with the same putty, and then cover all the walls. The layer should be 2 mm. If surface defects have a greater depth, the putty is not recommended to be applied.
- Cement mix. Walls for better clutch with solution must be rough. Otherwise, you will have to fill the donor diagonally to which it will go to bed even. Put the cement mass on a pre-moistened surface.
- Corners. If only room angles need in alignment, then metal or perforated corners will be used, which are fixed with the help of plaster and plastering subsequently.
Decorative wall decoration can be done after the final shrinkage of the walls, after 1-1.5 years. You can use decorative plaster, wall panels, traditional wallpapers, at their discretion.


