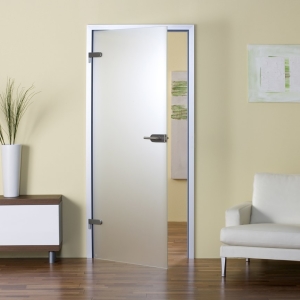
From drywall, you can make a variety of facilities, you just need to know the features of circulation of this building material. Plasterboard doors are usually installed in partitions from the same material. The procedure for manufacturing doors is the same as working with all plasterboard designs - creation of a frame and a casing material.
Door formation
The doorway is formed at the stage of wall manufacturing. In the aisle, horizontally two profiles must be fixed, one to the floor, the other to the ceiling. Profiles must be located in one vertical plane. The height of the door defines the jumper - the profile located in the horizontal plane at a given altitude, fixed for stiffness to the ceiling and the side metal structures. In this profile, install a wooden rail to enhance stiffness. Side doorway racks make from rack profiles. Typically, the thickness of the door frame is 75 mm, less often - 100. Therefore, the width of the rack should be similar sizes. If you wish, install on the profile of wooden rails of the corresponding thickness and length.

Install the vertical racks in the bottom profile on the set width, set it up vertically and secure to the upper and lower profiles. Standard door height - 2000 mm, width can be from 600 to 900 mm, with 100 mm increments. Accordingly, the box should be more than 6 mm vertically and 4 mm horizontally. If the wall is made of foam block, vertical profiles secure dowels after 30-50 cm. Between themselves, connect the profiles with short screws. Profiles with wooden inserts Connect nails with a length of 120-150 mm. Heads of nails and screws disguise with decorative plugs.
Manufacture of doors
As a door canvase, a drywall is 9.5 and 12.5 mm thick. Optionally use whole pieces. Measure the width and height of the door box. Reduce the width and height so that the doors come into a box with a small gap.

Place the plasterboard on the table, make the door marking on the size of the sizes. So that the lines are smooth, take the cutting boundaries. Slide the sheet to the edge of the table so that the label is located beyond. Attach the load to the hanging part of the canvas and bother the cut piece. Cut the paper with a knife. The end leve out the plane.

To protect the door corners from damage, use perforated corners that secure putty. Each side of the door to align with reinforced paper, plaster grid and putty.
Installation of loops
Secure to the door and loop box for doors. To install loops, make small recesses in the canvas. Pages Perform a manual milling from the looseness of the material. You can also fix the loops to the door without refinement of the canvas. Hang the door to the door frame. Check the location of the door in horizontal and vertical planes.

Setting the latch
On the door and box, make the position markup of the handle and latch. Drill holes in the doorway and perform a groove in the box under the lock mechanism.

Finish finish
Drive the door to the door on both sides and apply the finish putty. After the finish finish, the door canvas can be decorated - painting or apply a mosaic. Secure the latch, handles, decorative planks to the doors.
On the perimeter of the doorway, install and secure the platbands. Planks can be glued or secured.

Installation of plasterboard doors on the partition from the same material has one feature - the wall must be rigid enough to withstand the weight of the door. Therefore, the wall requires amplification, and the door is preferably made easy to reduce the load on the wall.


