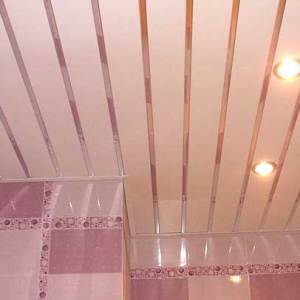
Racial structures - a well-known view of suspended ceilings. They are incredibly durable, durable, moisture resistant, diverse in their colors and the material used, primitive in the installation, etc. Aluminum rush ceilings have low weight, therefore they do not require particularly volumetric structures, metal - more durable, but at the same time much more massive. The choice is quite large, so each consumer can determine for itself the highest priority. Moreover, to install such a suspended design, it is absolutely not necessary to use the services of a specialist. Everything can be done yourself, with your own hands.
1
Installation of the cutting ceiling construction is a matter, affordable even inexperienced newcomer. But before you understand during the work, you need to make sure that all necessary tools are available. Prepare the following items: roulette, drill, screwdriver, passage, saw or scissors for metal, dowel and self-tapping screws.
2
The initial stage is to check the ceiling and walls on the subject of cracks, irregularities and other defects. Surfaces must be clean and smooth. If there are some flaws, it is better to eliminate them immediately. You should also think about the fact that it will be placed between the capital and suspended ceiling (pipes, cable channels, ventilation boxes, etc.). From this depends the amount of distance departed from the capital ceiling.
3
After the surfaces are checked, and the tools and materials are prepared, you can start a markup. Marking starts from the most even wall. On the ceiling parallel to a flat wall, 30 cm is carried out at a distance of a line. Along it will be mounted Stringer. Stripping from this line, they are applied as not more than 1.2 m. Directly along the lines denote the dots that will later become places of fastening of suspensions for stringers.
4
There are also places of installation of future lighting devices. Equally, it is important to note the level of the cutting ceiling on the wall. On the line of this level, the ceiling plinth will have to be mounted. Marking should be a smooth horizontal plane.
5
On the markup to the ceiling, the suspensions are mounted, on them - stringers. It is better to act in such a way that the first rack is installed entirely, and the latter could be cut and mounted close to the wall. In order for the ceiling in the end, it is absolutely even, it is necessary to align in the level of the Stringer system, controlling adjustable suspensions.
6
The next step is a willed plinth. It is fixed with self-drawing according to the markup on the walls, making a step no more than 60 cm. Next, you can begin the creation of the rush coating itself. But before you should make sure that all design elements are firmly fixed, and interpostil communication parts are completed.
7
The first (whole width) rail is inserted into the stringer until it clicks. Thus, it will be fixed without additional manipulations. Similarly, continue to install all subsequent rails, inserting the ends into the foam plinth. The first and last panels are inserted into the plinth also the side part.
8
At the end, cutting holes for lamps with scissors or knife for metal are performed. Next is inserted interrepusted inserts. Of course, if they were planned in advance.
Here, in fact, the entire process of mounting the suspended rush ceiling structures. If rereading the step-by-step instructions, you have found an answer not to all questions, after reviewing the educational video, you will certainly understand everything from "A" to "I".