As a rule, communications in our house are laid at all in sight. Inspection pipes of heating are located in the corners of the rooms, in the bathroom and the toilet are cast into the eyes of plumbing communications. The impression of what seen is very spoiled, so in most cases the decision is made to hide and decorate them to improve the room. Glkl has proven well in this matter. How to close the pipes with plasterboard?
With the help of drywall, you can make any design for masking communications in the house and it is also easy to remove it if you need to access pipes or replace them. The choice of this material is also due to its democratic price and simplicity of installation. In the manufacture of the box to close the heating heat and heating batteries, the environmental safety of drywall becomes relevant, since harmful substances are not distinguished when it is heated.
Prepare such tools:
- construction knife;
- saw or electric lobby;
- hammer;
- shock drill;
- screwdriver;
- putty knife;
- pencil;
- measuring tools - level, roulette, plumb.


- To do this, you can use a metal-plastic or wooden bar. However, we recommend to stay in the first embodiment, since such material is resistant to moisture and is suitable for use on the walls of the walls, say, butt.
- When choosing wood, which is characterized by a better sound insulation, you need to monitor that it is sufficiently dried, as well as to protect it from the impact of a wet environment.
- The drywall frame consists of vertical and horizontal elements, between which the step of 60 cm must be observed.
- On the walls, the floor and the ceiling should be transferred to the contours of the future frame using the measuring instrument and the pencil.
- Set this feature and fix the guide profile using a dowel.
- Then proceed to fasten the rack profile. The framework elements are combined with each other with special small screws on the metal, which are called bugs.

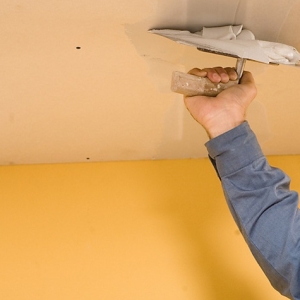
- Prepare billets from GCC for work. We will not repeat how the cutting them is carried out, you can read in our article - How to cut plasterboard. Detailed information about tools that are used for this, you will find here.
- To attach billets to the frame, use screws for metal, if you made a metal-powered frame, or on a tree - in the case of the use of a wooden bar. When screwing out the screws, make sure that their caps are drowned in the material no more than one millimeter and did not damage the sheet's cardboard layer.
- If you make a means for masking a heat radiator, it is necessary to provide heat holes with a diameter of about 5 cm to exit heat into the room through a plasterboard design. To create them use a drill with a special crown.
- Opposite the connecting devices and fittings placed on the pipeline, you should equip the ventilation hole in the box. After all, sooner or later it will be necessary to repair communications, and also no one has canceled the regular audit of the system.
- Often, a boiler will have to be treated from drywall. Therefore, at the stage of creating a design, it is necessary to take into account the possibility of such a fastener - in the allotted place in the metal profile it is necessary to attach a wooden bar.

But in any case, the work is carried out in such a sequence:
- Processing the surface of the primer intended for moisture-resistant plasterboard.
- Suts are put off using the serpanka.
- When applying putty on external angles, mounting corners are used.
- In the interior areas, putty and perforated ribbon are used.
- The putty of the entire box, which is necessary to continue to be stupid and put again when such a need has occurred.
- Surface primer.
- Application of finishing material.

Thus, the use of drywall is an excellent way to mask water pipes, heating radiators and other communications that you still have not solved hide.