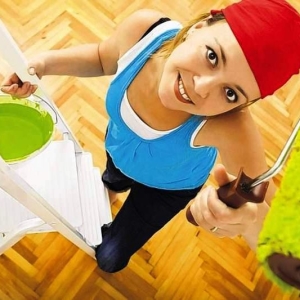
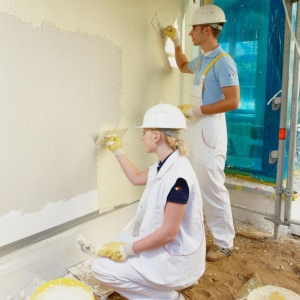
Choosing a finishing material, we are increasingly stopped at drywall, as it perfectly levels the surface. If you look at the sheet for the first time, it may seem that it is already initially ready for painting. In fact, the technological process is more complicated, and you still have to carefully prepare the basis for covering the painting composition to get a qualitative result.
Selecting paint
Since the plasterboard has heard a versatile material, it is possible to use enamel or water-emulsion paint. But the latter is preferable, because it is not toxic, and it does not have the smell. Using the kernels, you can get any shade of water-emulsion. As a result, a matte surface is formed, on which the flaws made are not very visible in the preparation of drywall. However, be prepared for the large consumption of water-emulsion. Enamels in their composition contain solvents, therefore they make a sharp smell. For coloring of drywall, they apply only in the case of a limited budget for finishing works, because their consumption is less than that of the water-emulsion paint. When choosing a glossy enamel, it is necessary to perfectly align the foundation to eliminate the manifestation of shortcomings in preparation. For work in the bathroom and similar rooms with high humidity, choose the water-based paint designed for such conditions. But the best option will be acrylic paint, made on a water basis, if we take into account the formation of condensate in the bathroom.
Preparation of plasterboard
Preparation of plasterboard walls under painting is the most difficult process, because the appearance of the surface depends on the quality of the base. An important manipulation is the primer of GLC, without which the moisture will be absorbed by the cardboard layer very quickly, which will not give when painting get a smooth color of the walls, and the formed stains will not be able to remove even the subsequent layers.
The technology of preparation of drywall under painting briefly looks like this:
- Surface primer. Uniformly cover the entire base with the primer, paying special attention to the joints. Wait until the soil dry.
- Sealing seams. It is necessary to prevent the trimming of the finishes in the future. The joints should be well covered with putty, tracing that the hats of self-tapping screws do not stick out and are not recessed overly, and then polished with sandpaper. Also remember to further project to them.
- Reinforcement of joints. To do this, you will need a serpent ribbon. In addition, you can use a cornering bandage made of paper.
- Strengthening corners. For this purpose, special corners are used, which in the same way as in previous cases are strengthened by putty.
- Putchawing of plasterboard. Treat the corners, joints, hats of self-tapping, cracks and scratches in GLC, etc. Then the finishing layer of putty is applied, which should be carefully polished with shallow sandpaper and prejudice again.
Read more about the preparation procedure in our article " How to put plasterboard under painting».

Tools
For painting of a plasterboard surface use such a tool:
- Kraspopult. This device is able to significantly alleviate the process of painting.
- Roller Provide more productive work. They are processed the main surface, be it wall or ceiling. It is not recommended to use a roller made of foam rubber for this. Prefer natural, pile, it guarantees a uniform distribution of the composition. If you apply a glossy paint, pick up a short pile roller, the length of which is up to 4 mm. When applying a matte coloring makeup, you will need a tool with a pile of medium length - 4-8 mm. To give the texture finish, fumble so that the pile is long - more than 8 mm. During operation, it is customary to work in one roller or one nozzle. It is better to use a roller with a telescopic handle, the length of which can be adjusted.
- Brush. When using the roller, it is difficult to high quality paint on the corners, under the windowson, behind the heating radiator, on the protrusions along the edges of the ceiling. Solve this question will help the brush, the width of which is 60-80 mm.
In addition, prepare glasses to protect your eyes and gloves.
Painting of drywall
Features of painting of drywall water-level paint:
- When painting the surface in several colors, divide it to the sections with a thin line applied with a pencil. Coloring is carried out alternately, when one part dries - you start to the second.
- It is customary to do several layers, since it can be brought through a putty and stripes, various in color.
- First take the brush and paint the surface around the perimeter. At this stage, the edges of the obstacles present on the walls or the ceiling are treated, for example, the base of the chandelier, the transition between levels.
- Pour the coloring composition in the bath, where it is convenient to make a roller. At the same time, the roller must fully dip in the paint. When the paint on the roller ends, it is lowered by one side into the container, rolling subsequently on the inclined part of the dishes.
- Now we move to staining the main area, while the roller needs to be rolling 3-4 times on one band and be sure to in one direction so that it is distributed evenly. If the surface is large, stained with strips perpendicular to the movements of the roller, and the width should be 60-80 centimeters. When staining the walls are moving from top to bottom and monitors not formed.
- After rollover, the paint passes the roller again through the painted area to distribute the paint. But if she began to capture, that is, 5 minutes later, it is impossible to spend these places.
- Apply the following layer of paint in a perpendicular direction in relation to the previous one, after that completely dry. Start work similarly - with a perimeter coloring with a brush.
- Make another layer, which must also be perpendicular to the previous one. In addition, it is recommended that the new paint strip overlap the old centimeters to 15.
- Often, there are flaws when painting drywall. Non-stratified areas are recommended to paint after drying the main layer. When the stain is formed with the paint, in no case rub it, if the composition managed to grab, wait until the final drying, take the surplus using the sandpaper, after which the paint should be applied again. If there are a lot of defects, strip the plot and make another layer on the surface.
- Check the quality of work will help the bright lamp, which should be illuminated by the surface, withstanding a small angle. When significant drops are detected in color, the sections are combed, and then tinted.
If you use enamel plasterboard surface to paint, then act differently. The paint is applied with zigzoid movements, and then it is already distributed throughout the wall. To do this, use a semi-dry roller. Two layers are made, because enamel is characterized by a greater shelterness than the water-emulsion composition.
At the final stage, it is recommended to cover the sections of the sections of the plots, which are painted with different paint, decorative platbands, and also set the perimeter of the plinth room.


