Whatever you decide to cover the walls, paint or wallpaper, your walls should be perfectly even. This result will provide you with the correct putty of the walls. This process is not very complicated, but still requires some knowledge and skills.
We will need:
putty (start and finish);
primer;
maclovice (brush for primer);
spatula in size 600 mm, 450 mm, 300 mm, small invoice 80-100 mm;
water;
capacity for making putty;
construction mixer (drill with a special nozzle, in extreme cases stick);
skark.
1
First of all, we need to prepare the surface that we will put up with. To do this, pre -placed walls should be praised with sandpaper. Then process with a prophetic primer and wait for complete drying.
2
Now we cook their putty. Although now they make a ready-made one, it is better to take dry and prepare the solution yourself, since you drive the consistency for yourself: someone is more convenient to work with a thicker one, and someone with a more liquid one. Remember that the finished putty solution must be spent at a time, then it dries and will be unsuitable for use. The time for which it needs to be used up is indicated on the package. Therefore, it is better to prepare the solution in portions. For preparation, we take a container (bucket), pour dry putty powder there and stirring continuously, pour water temperature with water. We bring thick sour cream to the consistency, make sure that there are no lumps. The first layer is the starting putty when it dries - the work ends with the finish putty.
3
Before proceeding with the putty process, decide: the wall will be painted or glued with wallpaper. If you glue the wallpaper, then the putty is applied to two layers Start and the finish and primed. If the wall is painted or it is planned to apply liquid wallpaper, then first a reinforcing mesh is attached to the wall, on top of which putty in two layers. The grid is also used if there are large cracks and potholes on the wall.
4
If the wall is relatively flat and does not require leveling, then the first layer of putty is applied about 2-4 mm thick. To do this, with a small spatula we apply a small amount of solution on a wide spatula (600-500 mm), distributing evenly along the edge. Now we stretch the putty along the wall, holding a wide spatula at an angle of about 30-40 degrees. It is advisable to make smears diagonally, thus easier to achieve the wall alignment both diagonally and vertically. After the first portion of putty is applied, from a large spatula, its remains are removed small and dropped to the general solution. Now with a clean spatula, we smoke the solution on the wall as smoothly as possible. We repeat the work done until the entire wall is processed.
5
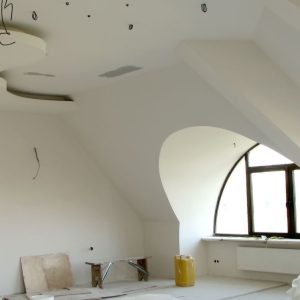
If the wall needs to be leveled, then each layer of plaster is overlapped. This will make it possible to avoid the formation of hillocks and transitions. By applying one layer of plaster, you do not align all the irregularities. This is easier to achieve in several stages. Keep in mind that each subsequent layer of plaster is applied only after the previous one has completely dried. Usually 2-3 layers of putty are required. The finished putty is applied with a layer of 1-2 mm. Very uneven walls are better to align with drywall, or by installing the guides, and putty on them. To remove even angles of walls and ceiling angles, it is very convenient to use a special painting corner profile. To begin with, it is fixed on the corner with a putty composition, and when they dry a little, they begin to putty.
6
The dried surface must be fabbed with sandpaper. The most suitable for this is the 150th. For the best quality of work, each applied layer is usually cleaned. Upon completion of the work, a primer is applied. The wallpaper is not glued to fresh putty, it is advisable to let it settled for 2-3 days, while maintaining a constant temperature and protecting it from moisture.
If you prepared the walls for wallpaper, then small scratches and flaws will hide, and if under painting, then here you need to remove a perfectly smooth surface! For beginners, this process is quite laborious, since the main thing here is the skill and skill that come with practice.