During construction work, many people are difficult to determine the sequence of stages, especially if there are primer among them. In this article, we will look at the primer functions, as well as the correct sequence of the preparation of walls to the finish, since the primer is used at each stage.
1
Properties. Various factors affect the preservation of a high-quality surface. To determine the need to apply primer, it is important to study its properties and functions in detail:
The main task of the primer is to increase the level of adhesion (sticking). It penetrates into the depths of the surface and creates a solid smooth layer. This means that the subsequent material will fall well and smoothly.
As part of the primer, there are special elements that penetrate the pores of the walls and fill them. Thus, the wall becomes moisture-resistant. Also in many primers are antibacterial substances that protect the surface from the occurrence of mold and fungi.
For wooden surfaces, it is necessary to use primer with a component warning the appearance of pests. In most cases, such compounds include elements for fire resistance. The cost of these mixtures is quite high.
Considering the foregoing, the primer must be selected according to the application. It almost completely deprives the surface of the absorption, which greatly reduces the costs of dyes and glue. Therefore, many consider primer and an economical protection option.
2
Stripping Now consider the full process of finishing the wall. At each stage, primer is used. Experience from old wallpaper and paint. Before removing, moisten and remove them with a spatula. You can hand the walls manually. To avoid a large amount of dust, it is preferable to use a grinder with an old vacuum cleaner connected to it. When everything is ready, apply the first layer of primer. This will help increase the adhesion and protect the wall from the occurrence of mold in the future. To reduce costs and facilitate work, use a paint roller.
3
Plaster. After that, experts recommend making shockting until the wall has dried yet. In this case, use a dry solution, since its absorption will be lower. Application of the solution is carried out in several layers. For the first use a solid liquid solution with a thickness of no more than 5 mm. The second layer is more dense and protrudes the main thickness of the coating. It needs to be well dissolved. Third thickness does not exceed 3 mm. It is used to align some places. After that, grip.
4
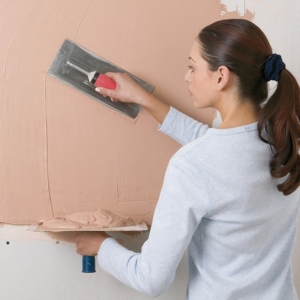
Putty. When the plaster will freeze, treat it with a layer of primer. This is done to increase the adhesion and prevent the crepe of small particles. When the primer is completely dry, proceed to the pump process. After applying the starting layer, use the primer. When it dries, apply the finishing layer, and then again the primer. When drying the putty, avoid the temperature differences so that cracks appear on the surface. Ensure that the coating thickness does not exceed the maximum allowed value (this is indicated on the packaging of putty).
5
Skuring. If there are big protrusions on the wall, overlap them with a small spatula. Then take the coarse skirt and secure it with the grinding bar. Perform grinding round and uniform hand movements. After the process of the slicer, the primer is applied for the last time. The meaning is not only in increasing adhesion to finishing, but also in preventing the creeping material.
Summing up all of the above, it can be said that after the shtatlevation of the walls, the primer is still needed. The opinion of the masters is divided into this matter, but it is better to do everything qualitatively and reinforced. The extra layer of the primer will definitely do not hurt the surface, which you can not say about his absence.