Despite the abundance of various materials and suspended structures designed to level the ceiling, the plaster does not give positions, as it has established itself in the best way as a durable coating that does not lose its properties over long. However, the qualitative result is guaranteed only if the strictest observance of the ceiling plastering technology.
Characteristics of plaster
Plaster - a popular way to level the ceiling surface, as the technologies are inherent in many advantages:
- This method is the least expensive, due to low consumption for building mixtures.
- The mixture for plastering is an impeccable material in terms of environmentally friendly, regardless of the type - cement or gypsum.
- In the ceiling plaster, the height of the room does not decrease, because the layer thickness reaches no more than 5 cm.
However, the plastering process is not deprived of its drawbacks. Since the maximum layer of plaster is limited to 5 cm, then the drops of the ceiling surface level, which can be aligned by plaster, are similar - up to 5 cm.

Preparatory work
Before plastering the ceiling, surface preparation should be prepared:
- Carefully rate the surface. If the irregularities that are present on the ceiling, small, makes sense to refuse such a labor-intensive venture, it is better to simply put the ceiling. If the height differences are more than 5 centimeters, plastering is inappropriate. In other cases, go to the next stage.
- If the old plaster is partially destroyed, the fungus settled on it, and the surface of "plowed" in deep cracks itself is recommended to carefully approach its preparation, removing the previous coating.
- Moching the ceiling with plenty of water, wait at least yes an hour and wash it again so that the old plaster was easier to separate, and as little as possible dust.
- The surface is cleaned with a rigid spatula, until the slab is reached. Please note: the plaster should also be removed from the seams formed between the plates. On problem areas it is recommended to use a perforator.
- To remove lime and cement dust residues, a sponge moistened with water is used.
- Further should be worried about the prevention of fungus, finishing the entire surface with a special antiseptic primer. If the mold is already available, it must be previously removed using any liquid that contains chlorine. Suitable white.
- At the next stage, cover the ceiling penetrating primer to strengthen the outer concrete layer. Also in this way it turns out to improve its clutch with a new layer.

Choosing plaster
Go to the selection of plastering mixture. You can use cement-lime or gypsum compositions. The last option is more modern, it is explained by the ability of plaster plaster to transfer the shrinkage at home and not to give cracks, which you can not say about the second form of substances. Yes, and adhesive properties of gypsum plaster is better. The ideal will be the use of rotband gypsum plaster from Knauff.

Installation of Mayakov
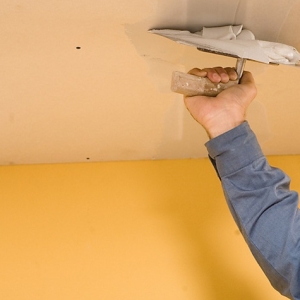
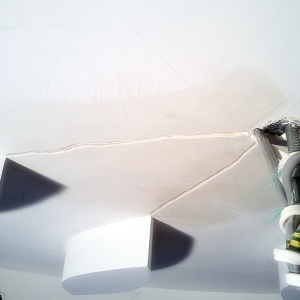
To facilitate the procedure for plastering the ceiling, special lighthouses should be installed. To begin with, find the lowest point of the draft ceiling using the laser level. Then it is necessary to determine the level of plaster by beating it by 10 mm, and pull on the carnations, which is driven into the horizon line, threads. Along the threads, fly to the stretch ceiling, using a ready-made plaster mix, and press it a beacon profile. When installing the profile, withstand a specific step, which must be 20 cm less than the rule that you plan to use for shockting.

Plaster ceiling
After installing beacons, you can start applying plaster:
- To spread the mixture, we use the spatula that has a middle width.
- When applied, the plaster should play beacons, surplus are subsequently removed by the rule.
- Move is recommended by Zigzag.
- At one time you should do a layer, the thickness of which is no more than 2 cm.
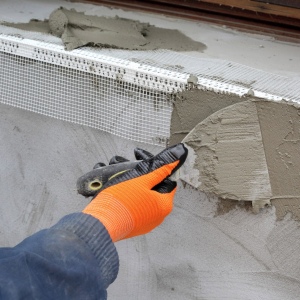
- After creating the first layer, it is necessary to strengthen the ceiling in order to prevent its cream and crack formation. To do this, use a reinforcing synthetic grid that needs to be pressed into a fresh plaster, withstanding the nest of 10 cm.
- Before applying the second layer, look forward to the previous one to dry.
- At the final stage, the beacon plates should be removed, and the grooves remaining after them to close the same mortar of plaster. If you used aluminum beacons, you can not get them.

Finishing
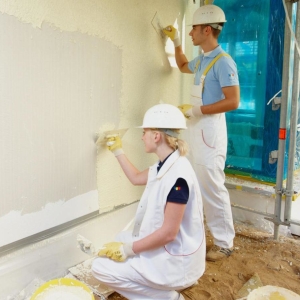
After plastering the ceiling, we turn to finishing works, but not earlier than 3-14 days when the plaster is completely dry. For this uses putty. They apply to it with a wide spatula in 2 layers, each of which should be trimmed well. After that, they are engaged in a grinding surface with a handmade grater with a grinding grid. If the ceiling area is big, it is worth using a special grinding machine that will help save time. Do not forget to wear a respirator and goggles to protect against dust.

If the ceiling surface plastering on beacons seems to be a complex procedure, we recommend viewing the thematic video and make a decision, plastering the ceiling.