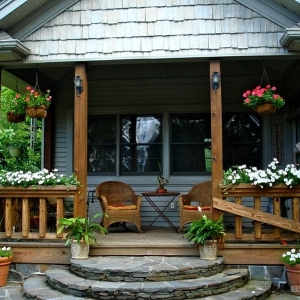
The visor over the porch is customary to establish to protect the entrance to the house from bad weather, in particular the door will not suffer from the rain, the lock will not freeze at a minus temperature, as it will be covered with moisture, and the porch itself will not be covered with snow. In addition, it is convenient to search for slowly keys from the dwelling, even if it rains on the street. The original canopy is able to give the facade of the structure a special unique appearance. Let's talk about how to make a visor and what material to give preference.
Before proceeding to the creation of a visor, carefully read the list of mandatory requirements that it must meet in order to make the functions assigned to it as much as possible:- When operating, the visor must withstand its weight, and the mass of precipitation in the winter season, including ice and snow that fall from the roof.
- Since water is often running on a canopy, it will be worth it to install her collection system. Water can enter the accumulative tank or storm sewer, it is already at will.
- It is better to provide a visor to protect and the entrance door, and the whole porch.
- The appearance of the visor should not be knocked out of the overall picture: the design should be harmonized with roofing, the porch and the exterior of the house.
- Polycarbonate. The palm of the championship during the construction of a canopy belongs to him. It is durable, practical, and also has a pleasant view and a variety of color schemes, which allows you to embody any designer ideas. In addition, working with it does not require any special skills.
- Metal. Metal visor is a simple, inexpensive design. However, it is not very easy to work with this material, moreover, a special device for welding elements will be needed. Of course, the attachments can be performed differently: use riveting or nuts with bolts. Another inconvenience is associated with the need for anti-corrosion metal processing.
- Professional flooring. Another common material, the second most popular after polycarbonate. However, it is inherent in one serious disadvantage: if it is damaged as a result of mechanical impact, the surface is unoperally distorted. By the way, to spoil the visor can even ordinary hail. Therefore, if you have made your choice in favor of this option, then buy a thicker straightener, in addition, it is much easier to work with it than with thin.
- Light plastic. The material externally resembles polycarbonate. Plates are designed for external work, unlike cheap plastic intended for interior decoration. The main feature of the material is in its ease, although it does not reduce its durability and reliability. If you need to achieve a certain shade of plastic, a special film is used for this.
- Metal tile and bitumen tile. If the preference is made towards one of these materials, the visor must be made simultaneously with the roof structure using the coating residue for this. And the identity of the roof and canopy is of great importance. In the case of using flexible tile, you will get a pleasant bonus in the form of silence during the rain, unlike metal tile.
- Forging. This is an expensive decoration of the front door to the house, it looks particularly solid together with forged railing and lanterns. With a limited budget, you can pay attention to the combined option - the combination of forging, as well as polycarbonate and tiles. When installing, consider that the design is obtained sufficiently heavy and under the additional load in the winter may collapse.
- Wood. Wood visors are most holistic and harmoniously look at a wooden porch and a church house, on which structures from another material look alien and tasteless. At the same time, the canopy must be treated with protective equipment to prevent rotting, the development of mold and insect attacks. As a waterproofing, the design is covered with slate, rubberoid, sheet metal, professional flooring or polycarbonate.

- At the first stage, determine the sizes of the canopy: it must cover the area of \u200b\u200bthe porch. Or adjust the dimensions at their discretion. Best Design and Size Display in the form of a visor drawing.
- Prepare bars for the frame, material for coating, rafters, drill, hammer with nails, screws with screws, saw, measuring instrument - roulette and level.
- Guided by a sketch of a canopy, cut the bars and treat them with the help of a protective composition to prevent the harmful effects of the environmental factors.
- Note on the facade the location of the visor and the point of its attachment (2 on each side). Drilling holes, attach the bearing bars with dowels to the wall.
- Collect together such structural elements: lower drives and side perpendicular elements. To do this, use self-tapping screws. Attach the rafter with frame dowels to the wall.
- Cropped side bars need to be combined with corner rafters with self-drawers. When installing, control the operation of the level.
- At the final stage, it remains only to build a carcass coverage. The selected roofing material is attached to the frame using the screws.

Thus, the installation of a visor over the porch is a simple job, but at the same time this design is enormous.


