For many years of operation of the computer, the keyboard is strongly polluted. Even if you hold the rules not to eat near your PC, dust and fine garbage accumulate and even can cause a key failure. Therefore, periodically you have to disassemble the keyboard. This process can be necessary when painting the keyboard panel, when replacing indicator LEDs or cables.
1
Before starting disassembly, be sure to disconnect the keyboard from the computer and take a picture of it from the front side. This will be useful to you for the subsequent accurate setting of the keys. The whole process is convenient to spend on the table that is covered with a tablecloth.
2
For disassembly, the keyboard turns over and with the help of a crush screwdriver all bolts are twisted in the following order: first in the center and then along the edges. The bolts are folded on the tablecloth, it is possible to the box, but tilting it, you will collect small fasteners for a long time. Now you can split parts of the case from each other.
3
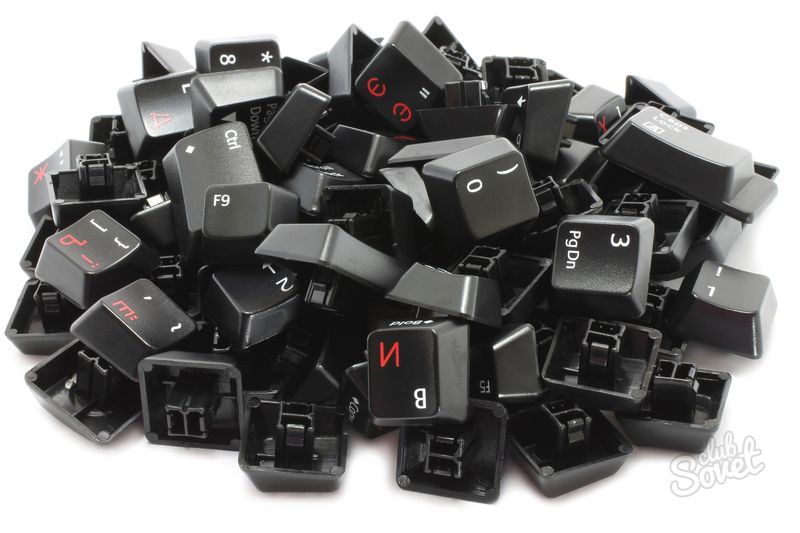
If you intend to spend some manipulations with the keys, take the top of the case and remove them, running up with a screwdriver from one edge. Thus, the button is lifted up and scores from the clamps. On large keys, for example, "space", "ENTER" and "SHIFT", there is an additional metal retainer, you will need to make a little more effort.
4
To replace LEDs or cord, take the bottom of the keyboard and remove the control board screwed by several bolts. This part contains a thin film with contacts that should not be touched.
5
After replacement or cleaning, you must set the key to your seat and easily push the click until it clicks. Having gathered all the buttons on the top of the case, align it from the bottom and close the latch. In the nest of an inverted housing, all bolts are installed and twisted half, starting from the edges and moving the cross to the cross. This will prevent the displacement of the halves of the case and will ensure the exact hit of all screws into their sockets.
Holding to all the items of this instruction, you will quickly discern and collect the keyboard, which after your effort will last for a long year.