


Almost since the release of the release, the developers offered users a unique opportunity - to create their own Unturned server to play with friends. How to do it, we will talk below.
Server features in Unturned
Despite the sufficient number of bugs and the final result, far from excellence, the Unturned personal server offers users a lot of advantages. So, for example, the server administrator can connect its cards, with a larger scale than the usual. The server application is fully implemented in the form of a console, so that the owner does not require additional power to handle the graphic component. Further adjustment and manipulation will imply the use of only licensed software. In the opposite case, the server may not work, or will players face a number of errors.
Create Unturned server from scratch
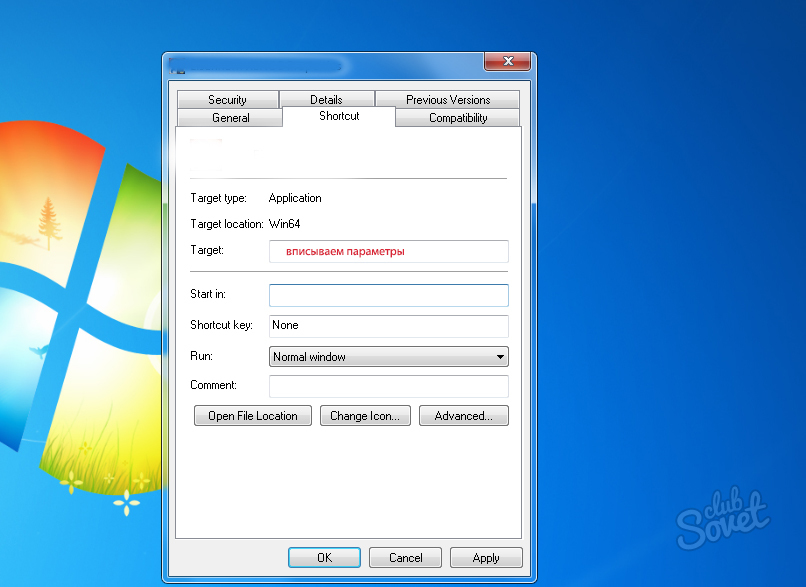
- Unlike previous versions, the server Unturned 3.0 begins with a shortcut settings. To do this, go to the folder with the game, find the file unturned.exe, click on the right button and select the item to create a shortcut.
- Once again, right-click the new shortcut and go to "Properties" tab "Shortcut".
- In the box titled "Object", it is necessary to prescribe the parameters with which the shortcut will open. For our server is -batchmode -nographics and its name via /.
- Among the additional options you can select: "+ lanserver" - vulnerable to cheating version, "+ secureserver" - with the use of anti-cheat.
- To make it more convenient, do not forget to rename the shortcut that starts the server, not the client game. After the first start to appear console on this server creation is completed, then you need to configure it.
Configure the server Unturned
This section also does not have to make a lot of effort. In the game folder, go to the Servers → "Server name" → Server and open the commands.dat file to edit. It fill in each line, as shown in the example, bringing your own indicators if necessary. It will look like this (on the attached image you can see the explanations for each item):
- Name.
- Port.
- MaxPlayers.
- Map
- Mode.
- PVE
- Perspective.
- Owner
- cycle
- loadout.

Open ports
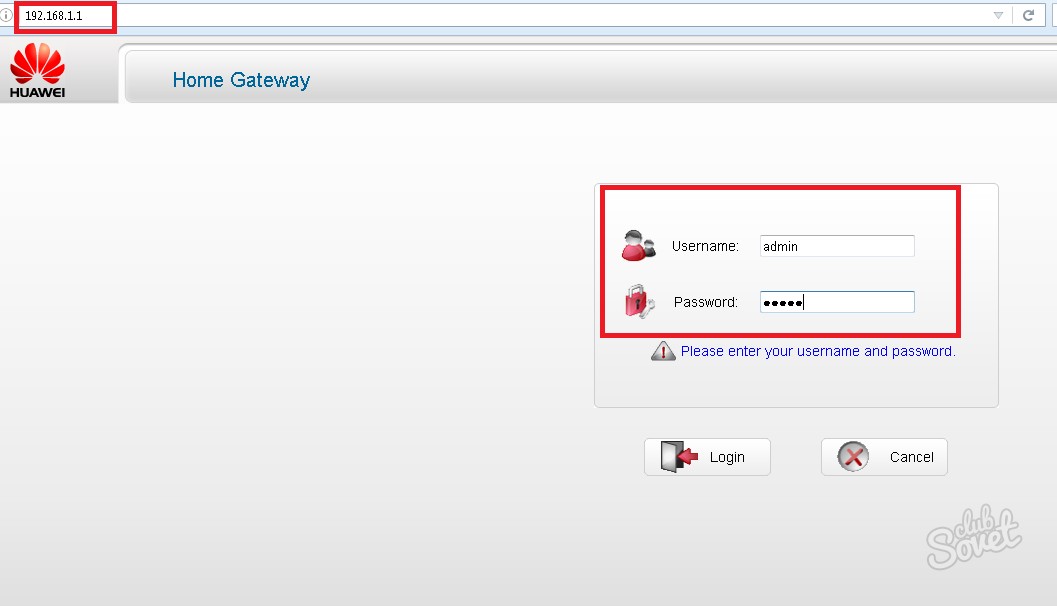
To join your personal server, friends can tell them the external IP and port address. If third-party players cannot continue to continue, check whether ports are open (and better to do it before the final server start).
- To do this, download the PortForward Network Utilities from the official website, we install, open and go to the "Status" tab, see the IP, which belongs to your router and transfer it to the address bar of the browser.
- A interface is opened with a login and password query, by default, they correspond to the values \u200b\u200bof the Admin \\ Admin. Since the web interfaces of routers of various models may differ, we are looking for a tab, with the name "Ports", "Forwarding" or the like. Enter the port and check the correspondence of the IP address.
If the players still cannot connect to the server, disable Windows Firewall. Alternative way - to play through the Hamachi program.


If someone is needed proxy, I advise you to pay attention to proxys.io, very suitable proxies, adequate prices, what else do you need?)