When mounting the door frame, it is often installed. This is the need when there is some discrepancy between the thickness of the wall and the lutki. They simultaneously perform several functions - prevent the door to throw and close the slopes. Dobors are more aesthetic and practical in care than ordinary slopes. To master the process of their installation with your own hands, even a novice master washes on a new door or installed earlier.
1
When questions arise how to install dobors on the door, it is better to decompose everything in the shelves:
The easiest way to buy ready-made volunteers coated with industrial production. The standard width of the coated voltage is from 80 to 550 mm, and for wide walls, databases are suitable from MDF.
You can extend yourself - from a suitable cutting board, dry wood or tunted blanks.
From the waterproof plywood with a film coating, which is known for its moisture resistance - for raw rooms.
Tip: Power Supports are suitable only for dry rooms without temperature drops. With the standard installation of the new doorway, the goodness will enter the prepared garbage from the inside, which must fit to the door frame. On old doors will fit separately tied upstands, which should be passed under the box in part. With a substantial disk of the door jam, the goodness will not eliminate the defect, because it is not carved the box, but a wall. Skotes only identifies the defect of the structure - the repair is required there.
2
We do all measurements, check the accuracy of horizontal and vertical base planes with a laser marker to avoid distortions and inaccuracies, pointing point. Small deviations sometimes can be aligned due to a small reduction in the thickness of the board. We are preparing tools for woodwork and all necessary materials.
3
Go to the installation process. It is easiest to install dotors on the door with your own hands immediately with the door frame. Door jamb lay out on the plane to the back side. We take the corners to the rectangle, check on the diagonals - they must be absolutely the same. If the doorway has a small skew, it is necessary to consider that one side will be in the louting as if longer. Low strengthened the temporary crossbar, which nails nails from the back side - to save the shape of the rectangle.
4
If there are no grooves for good in the jacket, then a quarter we form a manual milling up to the thickness of the chalkboard. The width of the good must match the depth of the groove in the door frame.
5
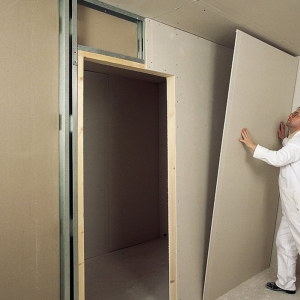
On the perimeter of the outer side of the door frame, dripping the strips of drywall or plywood width. There are enough 2-3 trimming under the upper crossbar and 3-4 - on the sides, the entire perimeter is not supplied with stripes. Slices Freshing nails or screws on plasterboard.
6
We formally definitely good for the desired size - the side in the size of the left and right side of the luttiki, and the upper bar is cut and stacked between the side. At the place of the placement of goodholds we apply a mounting glue or liquid nails, insert good and waiting for the adhesive of glue.
7
The temporary lower bar for fixing the perimeter after that can be removed. Door box mount in place and check the accuracy horizontally and vertically using a plumb, aligning struts. If the sidewalls are exactly vertically, respectively, then the horizontal perpendicular horizontal will be installed correctly.
8
If the installation and alignment of the box ended, carefully blow foam all the slots in small portions around the perimeter. We add the second layer only after setting the first and cut off the excess. Footage of foam from the door frame wipe the wet cloth moistened with acetic solution.
Tip: Remember that the mounting foam, frozen, creates pressure, so we gradually blow up the sidewalls of the jamb. Do not rush to remove the leveling struts and wedges of about a day - before the hardening of the foam. We complete the installation process of the plinth and decoration of slopes.