When replacing old windows on the plastic pledge of their durability and high-quality functioning, not only a good manufacturer's company, but also the correct installation of the window itself, and skillfully performed slopes. The slopes are the gap between the window and the angle of the wall, they perform not only aesthetic function, but also provide thermal insulation, protect against moisture. They can be done by themselves, having some skills and a certain construction tool.
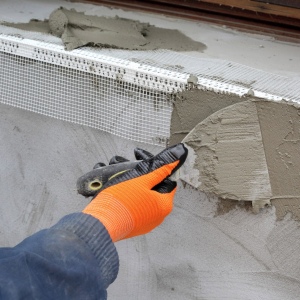
First of all, external slopes are performed. To do this, we need to blow the mounting foam all the slots, openings and gaps formed by mounting the window, or to close them with another hydro and thermal insulation material. Next, we have two options: you can stack off the slope or install the plastic. The first option is cheaper, but more time-consuming, the second more expensive, but easier in execution. For plaster slips, we take dry plaster (gypsum or on the basis of cement) and weigh it according to the instructions. It is advisable to use the thermal insulating plaster mixture for the first layers, and the last layer can be lowered usual. Before applying the plaster, the surface is well purified from dirt and dust, as much as possible (it is necessary to make protruding pieces of brick and cement). We establish wooden rails on top and on the sides of the slope, using the level control the horizontal and vertical, respectively (they serve as a literal shocking and removed after complete drying of the plaster). The plaster is applied using a spatula, the surface is equalized and the angles are displayed. For the start, the slopes are filled, one layer of the applied plaster should not exceed 5-7 mm. Each layer must be given time to dry, after which we clean it and apply the next one. After drying out the finish layer, it is perfectly grinding, applied primer and can be painted in the desired color. If the irregularity of the wall is significant, then the special profile should be used, which are attached to the wall under the control of the construction level and withdraw the slopes.


- So that the slopes were high-quality, they must be insulated.
- On plaster slopes it is necessary to apply the finishing layer - paint.
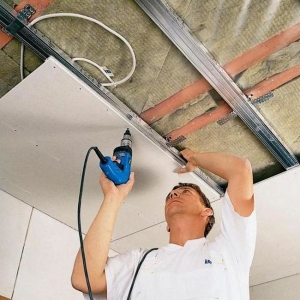
- The plasterboard bands are attached with the help of screws to the metal profile, the angles are separated by special angular rails.
- For any kind of slopes, it is important to save the detailed angle - the "Corner of the Dawn".
- It is impossible to leave an outdoor unprocessed slot - it reduces thermal insulation and reduces the service life of the window.
- The foam seam outside must be processed, otherwise it will quickly collapse by forming slots and holes.

By installing the slopes with your own hands, you will not only save money, but acquire new experience and skills. Well, if you still doubt your abilities, it is better to hide the team of specialists.