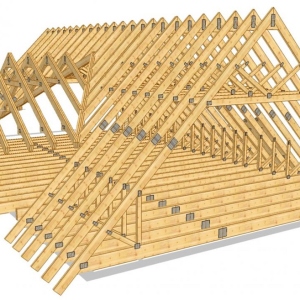
In order for the balcony to be a warm and cozy room, you must take care of the insulation of this space and know how to produce its crate. If you are not up to date, then this article will be an excellent allowance for you, familiarizing with the information you can make this process without any problems.
Balcony Outdoor Outdoor
Despite the fact that you choose for the interior decoration of the space under consideration, be something lining or drywall, it will need to be attached to the crate (if you say prose, frame). It cannot be said that the process in question is very simple and can be cope with it very quickly - it will be untrue, but if you carefully examine all the nuances of the process and focuses on the result, then the process will not be so difficult. Make the crate with your own hands, perhaps, especially if the instruction and all the materials you need are at hand.

It is worth starting, of course, from the floor covering:
- First, the bars must be flat on the floor (the people are called more lags in the people). In this case, their dimensions will depend on the area of \u200b\u200byour balcony, but the standard are the following dimensions - 70x50mm. This size is, according to specialists, optimal.
- It should be understood that the boards can be thinned under load, and if they are thicker, then the likelihood that they will scatter from moisture, is quite large.
- Lagging is necessary at a distance of 55 cm. If you decide that the lamp should also be horizontal, then you will need to install additional bars and here you help you knife and hammer to help you.
- It should also be noted that if you have a nudno to lay longitudinal lags, then in this case, the mount should be the method of "groove in the groove", which means that a special groove will have to drink in each bar.
- Longitudinal lags can be attached to the floor covering by nullifying them or in the absence of such anchors. The number of copputes in this case should be calculated from such parameters - 1 heater is 75 cm.
- In the event that the floor covering on the balcony is not quite even, then under the lag you need to put some kind of clins, if you fix it with a construction foam.

Experts in this industry often establish lags (longitudinal) on special wood stands so that there is no gap between the floor and the timber.
The next stage is the ceiling lamp.
Ceiling lamp
For the ceiling cable, it will be necessary to take the bars quite thin (no more than 40x20 mm):
- In case you are going to equip the dryer, then the bar need to take the thoroughly for the floor. The board that is laying on the ceiling is mandatory, it is worth checking the weight of an adult. These lags are attached to the ceiling of concrete. It is possible to do this with neglects, in this case the step will be 35 cm.
- The process of the ceiling lamp is complicated in the event that this process must be carried out on the very top floor of a multi-storey house where the ceiling may be absent. In this case, the process of the ceiling cable will be as follows:
- Fresh construction in the form of a visor at an altitude of 2.3 meters above flooring. It can be a roof of any forms, but most often it is a triangular design (the main element is an angular type profile). And only after that, the lags will be attached to the design under consideration.
Balcony wall shap
The process of the walls of the walls and the facial part of the space is a complicated operation compared to previous. In this case, the main elements most often become steel racks that will need to be installed in the corners of the balcony. For balcony fence, rods of steel are also used. In this case, the screws will need for fastening between themselves, lags may not even try to do something with metal details, it will be a waste of your time and strength. To fasten the details of the screws you need a drill, without it there is no need to do.

In some cases, the role of the carrier support is performed by bars from wood, which are installed in the corners of the space under consideration. But even in this case, the fastening will have to carry out screws, and then it has already to mount the bars from the tree.
All processes described above become prose if there is an electric welding in your hands. Metal structures are practical as a bars as a bar, because this material will not be involved in time and rot, which means that the resulting structure will not have durable and problems with its operation will not arise, despite the fact that in weight it is much more massive wooden.
You should not forget that you can use electrical welding in the event that there are no quickly flammable materials on the loggia. It is better that this space is completely empty, then any processes will be easier there.
Rarely when it happens so that you have to do the insulation of the inner wall of the loggia, because in principle, it is so warm. Sometimes it is decided to make the crate and the inner wall of the space under consideration so that the balcony watches beautifully.
If you, too, decided to do so, remember that the doomle of all walls on the balcony will take quite a lot of space, that is, the space to decrease, and, significantly


