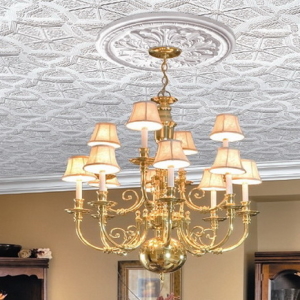
It will be given to the reference to the sophistication with the help of a decorative ceiling plinth. In addition, this product masks cracks in the corners and the ceiling connection errors with walls. But only under the condition of flawless installation. And it will help in this convenient carpentry device called the stub, which is used for smooth trimming of the baguette at the desired angle.
The problem of cutting off the cornice lies not in the complexity of the procedure. The fact is that the ideal angles of 90 ° are rare in our housing. Basically, they are curves, and so that it subsequently did not have to close the formed slots with a spacion mixture or silicone, it should be gently trimmed by manually. When cutting, consider the material from which it is made. To trim the plastic plinth you will need a hacksaw for metal. The plinth, made of wood, is processed with a saw saw, with frequent teeth. If you have a foam or polyurethane baguette, then take care of the presence of a plasterboard or stationery knife.

- Attach the plinth to the inner corner so that you can determine the cut line. Remember that the bottom edge for mounting to the wall should be done longer.
- Place the baguette in the device. The edge that will be attached to the ceiling, should be located downstairs. The position of the plinth should be similar to its subsequent placement when installing.
- Make sure that the baguette lies tightly to the opposite wall of the tool.
- Its end should be set at an angle that you need, for example, 45 degrees.
- Put the hacksaw into a special hole and cut off the unnecessary part of the cornice. Act neatly, smoothly, without sharp movements. Do not make excessive pressure, otherwise the edge of the cut may be damaged.
- When processing the adjacent part, it must be cut off in a mirror reflection.
- After circumcision, try 2 plinths, they must be perfectly shied with each other.
- If there are absorption on the joints, it is required to fit. For wooden eaves, use a file for baguettes of soft material - a knife.

- First you need to decide which dimensions will have a tool. It should be taken into account that the height and width of the stouch depend on the size of the circumcision baguette, they cannot be smaller than the eaves. The recommended dimensions are: length - no less than 50 cm, width - 20 cm, height - 20 cm.
- For the manufacture of stubs, the basis will need, which uses a wide rectangular board. Its dimensions are similar to those described above, that is, 50 by 20 cm. The thickness is 2.5 cm.
- Guide boards are needed for the direction of the shoulder of the hacksaw during the cutting of the baguette. They should be the same length as the basis. Thickness does not play a special role. The width is determined taking into account the thickness of the base: 20 cm + 2.5 cm \u003d 22.5 cm. Take the guides in the form of rectangles.
- Then you should fasten the guides to the ends of the base using screws.
- To mark the corners, use the transporter. It is enough to put the marks in 45 and 90 degrees.
Draw the lines that should go from these points along the walls of the guides. Apply for this a square. - On these lines almost to the niza itself, spend the cut to make the slotted under the hacksaw. Boards twist.

Thus, if you correct the corners on the ceiling baguette, you can install them without problems!


