Wallpaper is probably the most common way to decorate walls. How to punish the wallpaper, about everything. But together with the advent of new types of wallpaper, new rules and features of sticking appear.
1
First of all, you prepare the surface on which we will stick wallpaper. Walls need to be cleaned from old wallpaper. If there were paper, they are wetting them with water or soap solution when they get intoxicated, gently remove from the wall. Where the wallpaper is poorly removed, you can repeat the soching procedure or sip the hot iron through the wet cloth. Small, firmly "clutched" residues will be schedped with a spatula. If the wallpaper is washable, then they need to scratch or cut into order so that they can get well. Two-layer vinyl walls are divided into the layer, for this they make horizontal cuts, wetted, the upper layer is removed, and the lower (if it is tightly held on the wall) - leave it, it will be a good basis for sticking new wallpaper. After removed the old wallpaper, we clean the walls. Cracks, irregularities, chips - all plasterer, re-cleaned and be sure to be ground. If necessary, too uneven walls are aligned with plasterboard. Before pasting wallpaper, all the seams between the sheets of drywall are needed to sharpen, everything is also soil. Remember that the base for pasting wallpaper should be smooth, clean, dry, durable (the plaster should not be painted).
2
Preparing glue. Usually, the composition is bought at once along with wallpaper, the seller will tell you how glue is needed to the chosen wallpaper type you, or carefully read on the label. We calculate the required amount of glue and wept it exactly according to the instructions. To do this, first pour a certain amount of water into a bucket, we begin to interfere with it with a stick and slowly, a thin weaplation of a substance, we continue to interfere before the formation of a homogeneous consistency.
3
Now it is necessary to prepare a workplace. The floors should clean and wait until it is dried. Close all windows and doors, wallpapers do not like a draft. The optimal temperature is 20 degrees, if lower, it prolongs the time of drying wallpaper. Sockets and switches to de-energize and unscrew the panels from them.
4
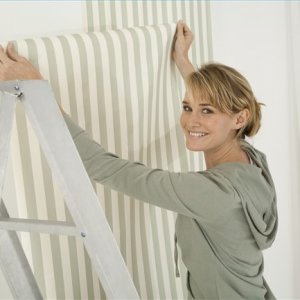
Now we take the wallpaper. They must be measured and cut. Measure the height of the wall from the ceiling to the floor, measure this magnitude on the wallpaper and add 3-4 cm on each side of the sliced \u200b\u200bweb. This stock is necessary in case of irregularities of the walls of the walls. Be careful! If the drawing requires dosilets, it is better to decompose the wallpaper on the floor, the image up, mapping it and only then cut off the cloth. So you can cut the entire roll at once. In this case, wallpaper consumption increases.
5
Glue wallpaper starts from the window. To do this, from the angle of slope or from the corner of the wall (if it is next to the window), mark a flat vertical line using a plumb or construction level. Now we apply glue on the glued cloth: in the instructions it is indicated, for what time it is soaked, for impregnation we put the canvas glue inside. At this time, we apply glue on the wall in size of the canvas. If you have phliselin or glassy, \u200b\u200bthen the composition is applied only on the wall. Note that when impregnation with glue, the walls are lengthened, so leave them smeared the same time! The first strip of glue through the vertical schedule. Press the cloth to the wall with a clean, dry vet, or rolling with a special roller from the bottom up or from the center to the edges. The next canvas glue jack, especially it concerns vinyl wallpaper. Ordinary paper and thin can be glued to the mustache, while watching the matching match! With the help of a sharp knife and a wide spatula, which serves as a limiter, cut the top of the wallpaper by the level of the ceiling plinth or ceiling. The lower edge is cut by the level of the floor, if the plinth was not removed, then a little below the level of the plinth. Crop needed before drying glue. If you need to make an indentation from the ceiling, then in advance, swipe a direct horizontal line throughout the perimeter of the room. And the top of the wallpaper of a coolness from it.
6
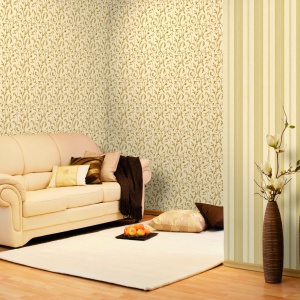
Glue corners. It is not necessary to try to punish the angle of the solid web, this can lead to the formation of folds or deviation of the cloth from the horizontal line. It will be more correct to measure the distance from the last strip to the angle (it is better to measure in 4-5 places over the entire height of the panel) + 2 cm per battery, cut off and glue. In the corner, the edge edge is well pressed, it is possible a stupid side of the knife. If the wallpaper is dense, then the remaining piece should be glued with a fascinating wall. Now both bands cut through the angle with a sharp knife on the line, trimming should be removed and press the edges well. Seam should be inconspicuous. If the angle is outer, then measure the size of the canvas from the edge of the latter to the angle + 250 mm. We stick, bending the residue on the other side. If the angle is smooth, then you can then glue again, if not, you cut off the level and deliver the remaining piece (if the wallpaper paper, you can simply hold the vertical line and break the flashes).
7
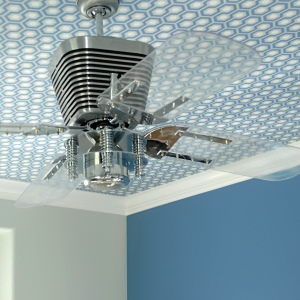
Glue ceiling. Wallpaper on the ceiling is glued perpendicular to the window. Just like on the wall, first celebrate a flat line for gluing the first wallpaper strip. This can be done using a conventional lace, grated with chalk or blue. The canvas, lubricated with glue, is applied to the ceiling and aligned on the intended line. After that, we press the folds tightly, we ride the fold and ride well a rubber roller. On the ceiling, the wallpaper is much easier to glue with an assistant.
When sticking wallpapers, the pledge of success will be the observance of all rules, as well as attentiveness and accuracy. If you do everything right, it will turn out no worse than the masters!