Most people moved to touch phones. They are practical, comfortable and beautiful. Despite all the advantages of such gadgets, there is a significant minus - touchscreen often cracks. In many cases, the sensory glass is inadvertently divided, and its replacement is expensive. In the article you will learn how to replace the touchscreen personally on the example of Sony Xperia G ST26i.
1
Phone in a terrible state, the sensor does not respond to touch. Save the poor man. Looking in advance, immediately read the list of necessary items:
new sensory glass of the same model from the original manufacturer;
mediator;
screwdriver T5;
tweezers.
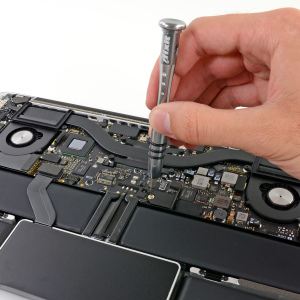
2
Why is the mediator? It is very convenient for them to remove the phone cover, keeping the integrity of the design. Having bought all the materials, go to the case. Remove the posterior phone panel, remove all SIM cards, memory card and battery.
3
T5 screwdriver unscrew all visible bolts. Put them in the box not to lose. It would seem that it was time to remove the panel, but no. The Sony phones have a hidden bolt, which is under a small cap in the upper left corner of the screen (rear view). Gently remove the protective panel and unscrew the bolt.
4
We take the mediator and, carefully, tend to them, break the body throughout the perimeter. Insert only the edge of the mediator so as not to damage the parts inside. After the metal case is removed, check the integrity of the latch.
5
The next step is to remove the buttons located on the side of the mobile phone. To do this, take a screwdriver and slowly uphold the keys. Be careful when moving, do not move the movements, so you damage the loop. Now remove the orange protective film from the next loop. It is right under the removed keys. We take tweezers, very gently introduce it into the loop of the loop and carefully pull out from the connector.
6
Gently raise the board. Please note that at the bottom it holds another loop. Remove the protective film and remove it, uploading to the tweezers. The board is completely disconnected. Again we see orange film, remove. Turn off our touch screen, delaying the plug.
8
The next thing we will do is check the work of the new touchscreen. To do this, attach it to the place of old, attach the board with the side loop and turn on the phone. After launching a mobile device, take the new touchscreen by checking on working capacity. It should look like the whole design should, as in the photo below.
9
Making sure the sensor, go to the full removal of the broken screen. To do this, turn on the hairdryer to the full power and warm up the entire display of 5-10 minutes uniformly. Optimal heating temperature 70c. While the hot screen is hot, start shooting. Do not spin glass.
10
The sensor has been successfully removed. Do not touch the black screen. If something fell on it, very carefully remove the tweezers.
11
It's time to attach a new touch screen that we do. Remove self-keys from glass and install in place. We glue all the orange films back. We perform the phone assembly in the reverse order of disassembly. Turn on the gadget and rejoice in a whole touchscreen.
On this, the master class on the replacement of the sensor is over. If you doubt your abilities, trust the work to specialists.