To create in Photoshop, for example, an interesting multi-layer collage, most often required from the background to separate the selected object for its subsequent movement. Consider how the Adobe Photoshop CS5 with a photo cut a person, in particular the child's silhouette.
1
Run photoshop. In the main menu of the program, select the "File" → "Open ..." tab. Next, open the photo folder on the computer and drag it into the working window.
2
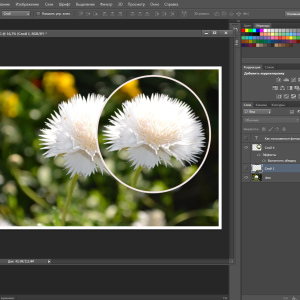
To separate the silhouette from the background, it must be allocated. To begin with, use the "Fast Mask" and "Brush" tools. Next, find the quick mask on the toolbar (rectangle with eye) or immediately click the "Q" key. Then activate the "brush" and set the appropriate size on the parameter panel.
3
Gradually start painting an object with a brush in a mask mode. To increase the brush, press the curly bracket), to reduce - (.
4
If necessary, approximate the image using the Navigator palette and the corresponding slider.
5
Complete staining. If it seems to you that you are inadvertently drove out of the edges, then activate the "eraser" and work them like a brush. Then disconnect the "Fast Mask" tool.
6
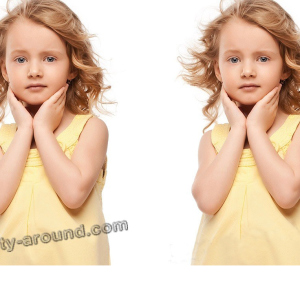
Pay attention to the baby shown on the photograph - the contour became dotted, in other words, he stood out. Next, refer to the toolbar again and activate one of the allocation tools. Now go the mouse in the photo and right-click on it. In the window that opens, select the "Cut to a new layer" command.
7
Translate a look at the "layers palette". The silhouette of the child moved to a new layer. For clarity, uncheck the box from the first layer - it will turn off.
8
Also experiment with the background - remove the tick and make sure the object is cut.
Adobe Photoshop features allows you to cut objects from the background in various ways. We reviewed only one of them, and this is not our last lesson.


thank you very much!!! Your advice was very useful!