The easiest way to get a photo with a blurred background is already at the shooting stage. To do this, it is enough to open the diaphragm as widely as possible or use the long-focus lens. If the background of blurring the background is set for an existing image - software processing methods are used.
1
To work with photos, both specialized editors can be used and universal applications, such as Adobe Photoshop. Since there is practically no free on this class, we will consider the possibilities of blurring the background with the help of photoshop. So, run the program and open the file with the image in it.
2
The easiest way to blur the photograph, except for a certain limited area, is implemented using the "Magnetic Lasso" tool. However, it is more suitable for highlighting images with smooth edges. Consider a more versatile processing method - with a mask. To begin with, create a copy of the image (layer in Photoshop terminology). To do this, simply press the key combination "Ctrl" + "J" Either drag as a layer Background On button "Create a new layer". On the tab Layers A corresponding copy of the background layer appears.
3
We will process a new layer by applying a blur filter.
4
The degree of blur is regulated by changing the value of its radius on the filter settings panel or dragging the corresponding slider. Put a tick in checkbox View and visually evisurate the resulting degree of blur.
5
Having achieved the desired result, press the button "OK"And to the blurred layer we use a mask using the "Layers" menu → "Layer-mask" → "Show all".
6
The white rectangle appears on the tab Layers - And there is this mask. To specify the program not to apply a filter to the image areas you need, paint them black. To do this, the slider is at the top we change the color, and then select the "Brush" tool and set the properties you need. The rigidity of the brush takes 20%, and its size is changed in the process. An exact tool is more accurately drawn borders, and solid sections are painted faster.
7
We paint the required sites (we ereate the mask on them), do not worry abroad. To adjust the flaws and more accurately highlight the desired object - we change the color on the white and apply a mask from the blur side. If necessary, we change the properties of the brush, the result is evaluating visually.
8
Having finished allocating the foreground object, make the layers, by selecting the appropriate menu item.
9
Then you will unlock the background layer. For this, twice on it click on the tab Layers, enter an arbitrary name and press the button "OK", no longer changing.
10
Save the resulting result to the image file. Since photography was processed - choose JPEG format.
11
On the panel JPEG parameters Install the required quality, select the progressive format and press the button "OK".
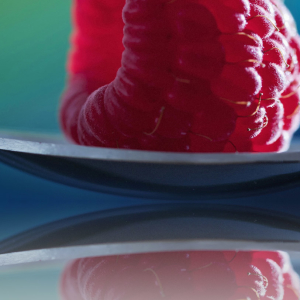
Blurred background in the photo gives an end to the image and focuses on the main thing. A good graphic editor allows you to correct the "omission" of the photographer at the shooting stage in a few minutes.
Share advice:"How to make a photo with a blurred background"