An important part of the company's image is a logo. Most often it seems like a certain unique image with text. Consider the easiest way to create a logo through a well-known graphic editor - Adobe Photoshop CS6.
1
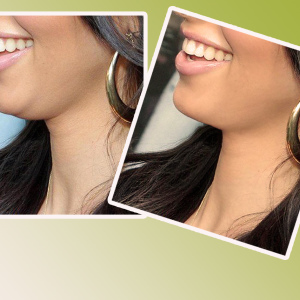
To begin with, concentrate all your attention on the organization for which, in fact, a distinguishing mark will be created. For example, you have a small image of a beauty salon or a cosmetic office. Find the image on the Internet that could come as the main element for your logo - for example, this is a photo of a girl with a beautiful wedding hairstyle.
2
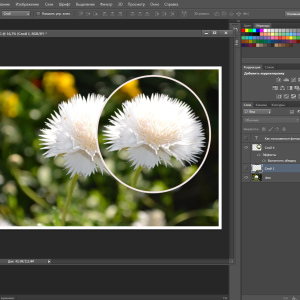
Run the editor to work, open the selected file using the file command → "Open ..." and immediately pay attention to the colors palette. By default, it is white and black.
3
Remove the silhouette shown in the photo, the art effect - refer to the filter dialog box through the main menu and the "Filter" command → "Filter Gallery".
4
Change the image scale using the "+" and "-" buttons at the bottom of the viewport. Select the category and directly the filter itself - here you can experiment plenize. Suppose you are defined by the "Sketch" filter with the "Torn edge" effect - set the parameters using the sliders and save the result.
5
Now apply a special color effect to the image - convert it to the opposite color. Activate the Inversion icon on the "Correction" palette or click on the creation icon of the new correction layer and select "Invert" from the list.
6
Combine the visible layers through the "Layers" menu → "Combine visible" or a combination of "SHIFT" + "Ctrl" + "E", and then you immediately create a new layer "SHIFT" + "Ctrl" + "N".
7
Fill the "layer 1" with light brown color - activate the "Fill" tool, determine its color on the colors palette and fill, clicking the tool on the background image.
8
Next on the layer palette, set the "Light" mode and impose it on the layer using the command in the drop-down list. Then combine the layers: SHIFT + "Ctrl" + "E".
9
Now go directly to creating a logo. Open with the "File" → "Create ..." command, a new amount of arbitrary size with a resolution of 72 pixels / inch. Through the "Horizontal Text" tool, enter the name "Your Salon". On the parameter panel, experiment with the selection of font and size.
10
Purify an individual style - double-click on the text layer and in the Layer Style dialog box, set the desired parameters.
11
With the help of the "Magic Eraser" tool, get rid of the white background on the sketch, and then drag the silhouette of the girl in the logo working window.
12
Next, using the "Free Transformation" or "" Ctrl "+" T "tool, change its size, and also reflect it horizontally by clicking the right mouse in this layer and selecting the required item from the list.
13
Just as for a text layer, give the individual style to the displaced object and rejoice for the work done.
Make an independently more complex logo where multiple overlapping of various objects, layers and effects are used, it turns out not for everyone, but there is nothing impossible for professional web designers.


good afternoon, tell me where in photoshop find curls?