Without a professional welder, you can spend the loops on the gate yourself. The main function of the loop is the discovery, as well as the closure of the gate, so it is important to weld them with welding - right.
1
In order to welcome the loop at the gate, the following materials and overalls are needed: a protective mask, an electric welding machine, can be inverter, dry electrodes 3 mm, the costume of the welder, shoes, loops with a bearing or without.
2
On each sash you need to install two loops. It is important that they keep tightly and there was no crack between the gate, it will help to avoid creak and jerks. Be sure to follow the safety technicians: it is understood by work in gloves, in a special mask, costume and shoes, it is also necessary to pay attention to the room, there should not be sawdust and dry grass nearby.
3
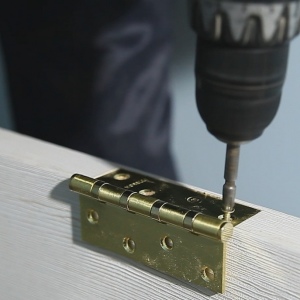
Try to choose the right loops that differ in modifications, size, painting and curly finish. According to the design, they are divided into bivalve, with extended wings and T-shaped. When buying parts, do not make a mistake in the selection of fasteners. The loop according to the technology is welded with platforms. Be sure to fix the solid seam. Pick the patch, taking into account the strength of the material, the weight of the gate, and the length of the welding seam, which can keep the weight of the door design, can be defined on the eye.
4
On the canvas, retreat from the top and bottom of 25 cm and take the desired distance by the construction pencil. Using a plumb, install the web vertically straight. First, the fields are measured for plastics, then marked. Before welding, check the installation of the gate. After aligning two sash and check the correctness of the gate position in the closed state. Be careful, otherwise, after the end of welding with electrodes, defects may appear.
5
Welding starts with lower loops, which are located on the pillars. Grease the loops in advance with solidol, it is done to prevent their sintering. Under each lay match on the edge, so that the door does not eat. At first, the bayonge of the loop is welded, where it is a bit grabbed with welding, then the welding continues with light horizontal movements of the electrode from the bottom up.
6
After completing the first seam with a laser level, check the opening correctness, respectively, the door closing. It is important to pay attention to the correct location of the axis of the welded loop and the location of the second bayonet loop. If the diacast is not detected - you can continue to work. Before using the goal with the loops, remove the frame, smearing well with solidol and put back to the place.
It remains to handle the places of welding with a grinding device and paint the gate.