If you have made several separate tables in the Microsoft Office Word program, but then you decided that it is better to put them in one large table, then this is possible in just a couple of seconds. At the same time, it does not matter at all whether your table is the same width or not, how much it contains columns or lines. The association is performed in two ways: the first is suitable for all tables without exception, and the second is only for the same width, and it retains formatting inside the cells, so you do not have to align the tables after the connection. In this article you will learn both methods and see their visual example.
How to combine tables in Word: the first way
- It is perfect if you have a different table width and a different number of columns in them. Of course, it is best to previously fit them under one width so that the table looks more aesthetic. This can be done by a cursor by simply stretching or narrowing the boundaries of the tables.
- If you do not fit the width of the tables under each other, then the second table will stick to the first on the left edge, that is, there will be a different size.
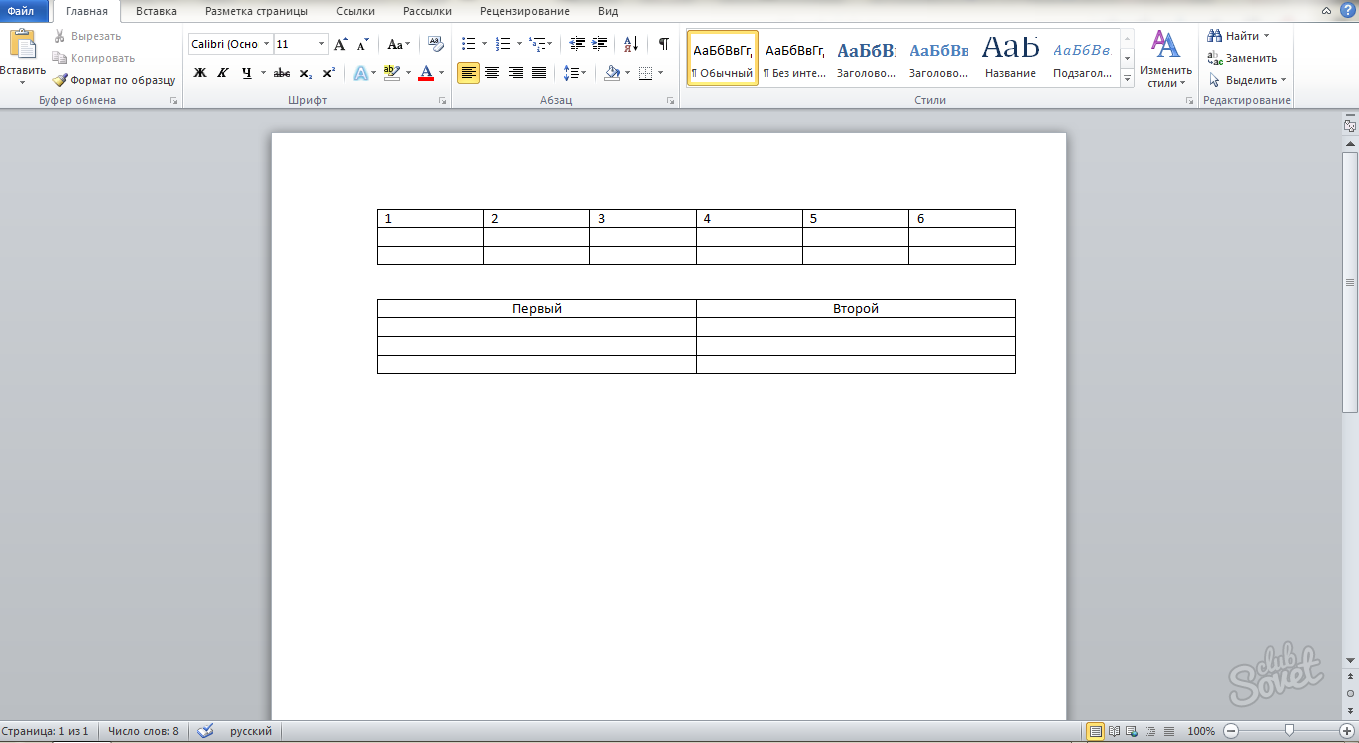
- Select the lower table completely. To do this, you can use a tool with a black arrow that appears yourself when you point the table to the table.
- As soon as the selection is done, pay attention to the left upper corner of the table - there will be a small square.
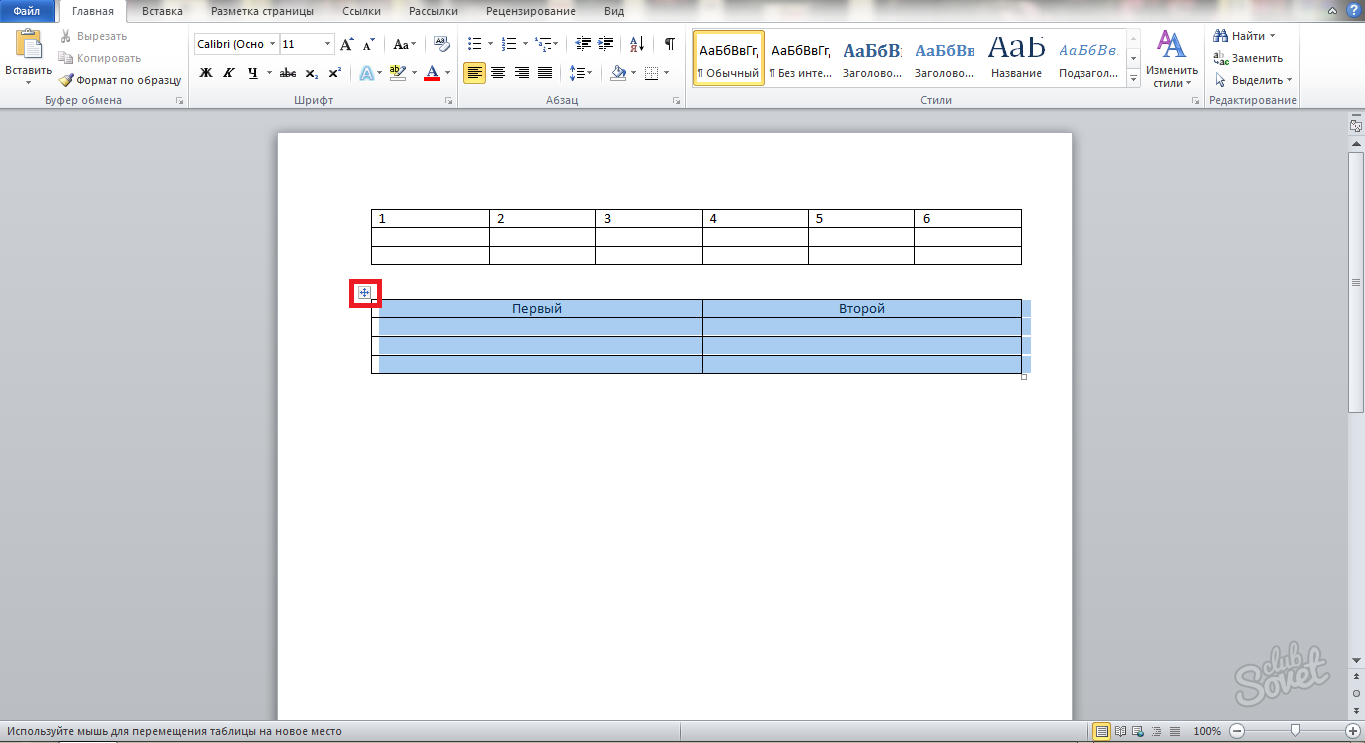
- Gently take this icon with the mouse by holding its left button, and start moving. You will see that followed by the whole table that you highlighted. Close the tables closely and glue them to each other, just letting go of the mouse cursor.
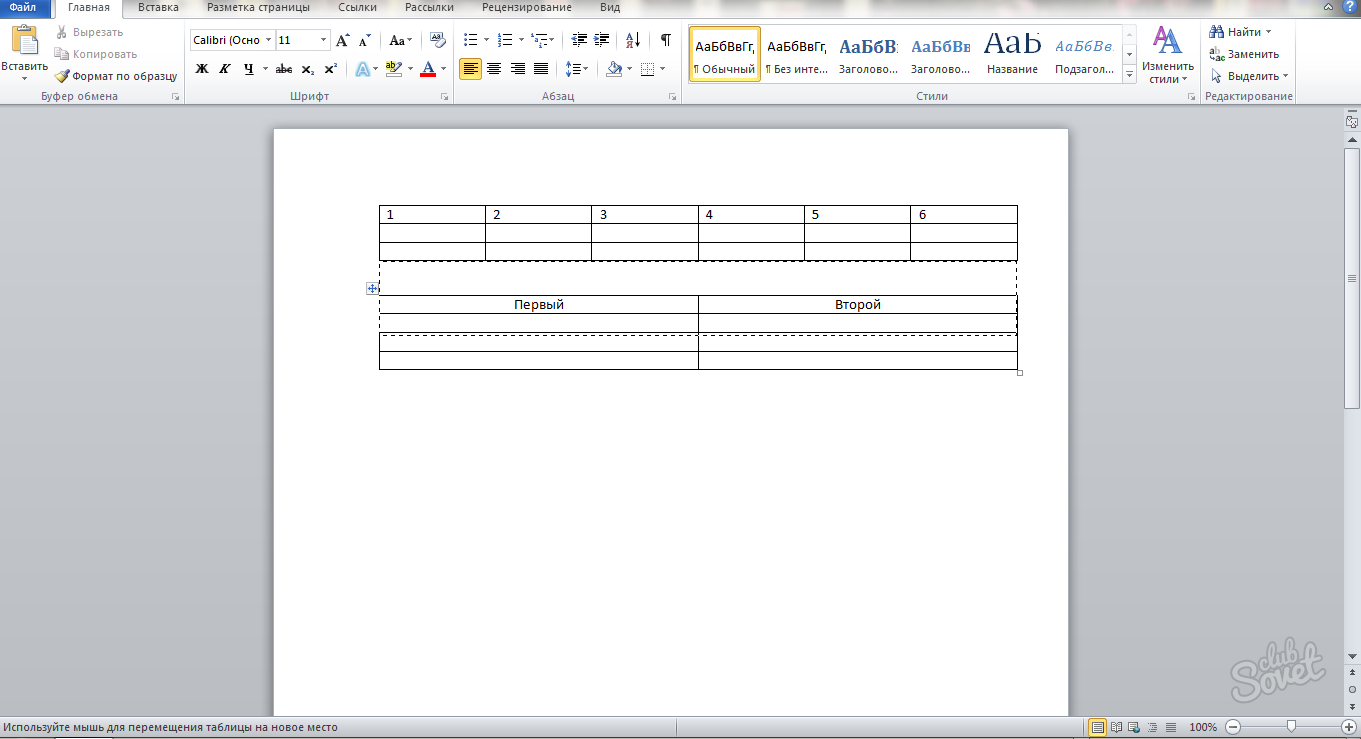
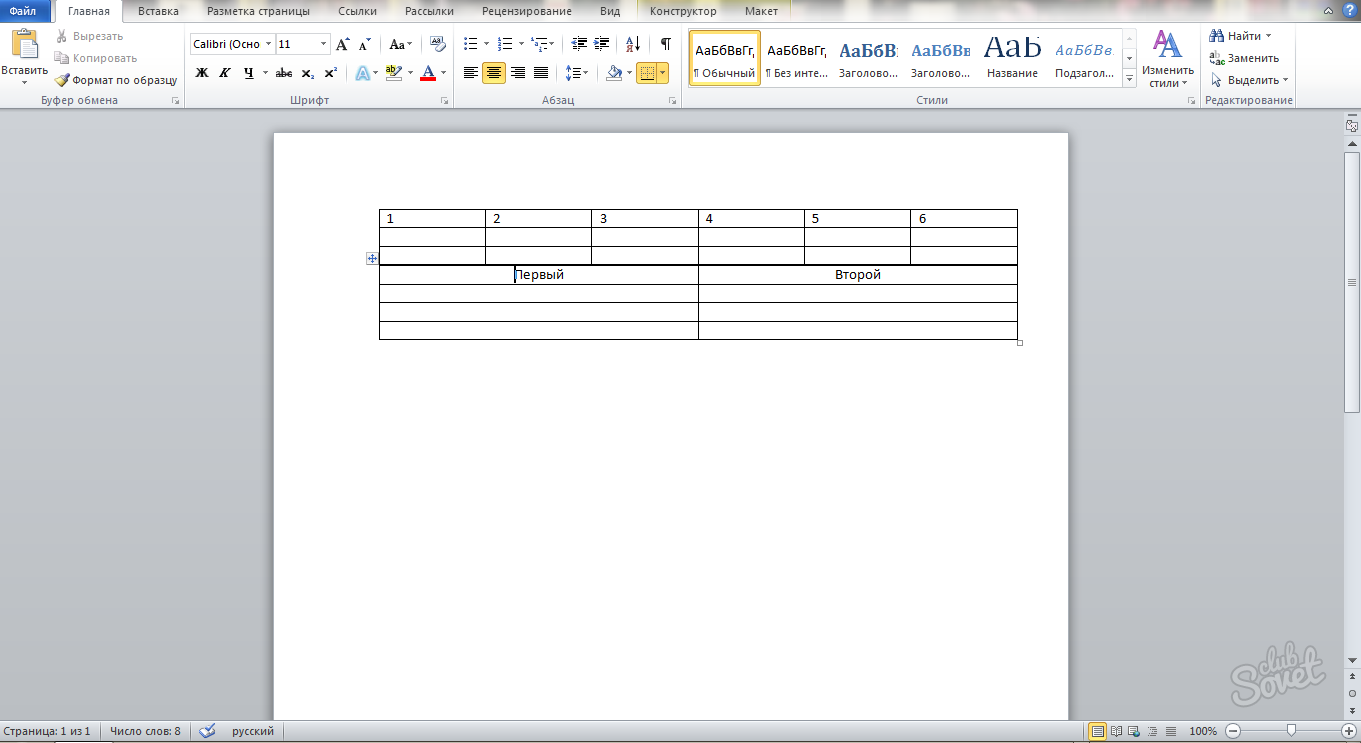
- As you can see, the tables merged into one, while retaining their formatting. In this way, you can connect any tables of any size. Between them there will be a slightly more oily border than between its other parts, but it is easy to fix it, simply removing one of them.
- If this method does not suit you, and you want to drain the tables differently, try the second step of this article.
How to combine tables in Word: the second method
- This option is best used if you have the same number of columns in the table. Then they will unite smoothly and clearly, not leaving borders among themselves.
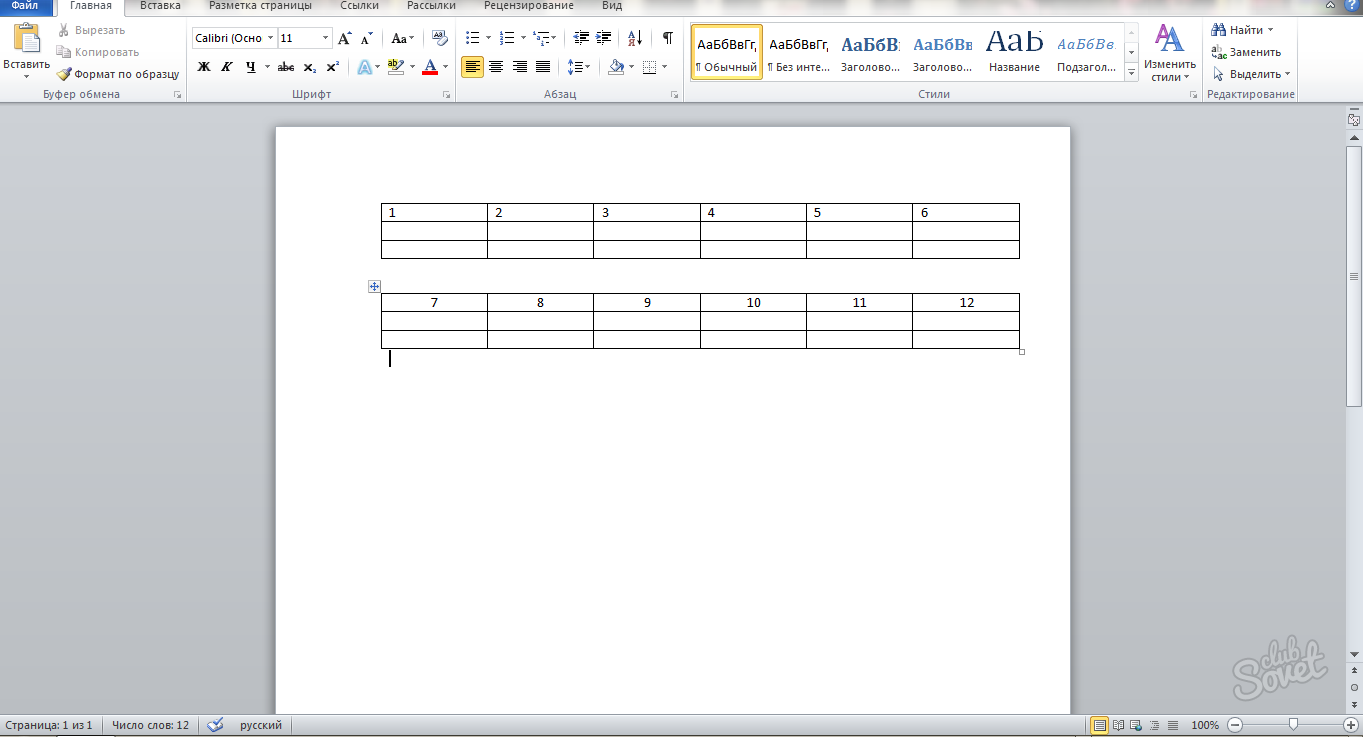
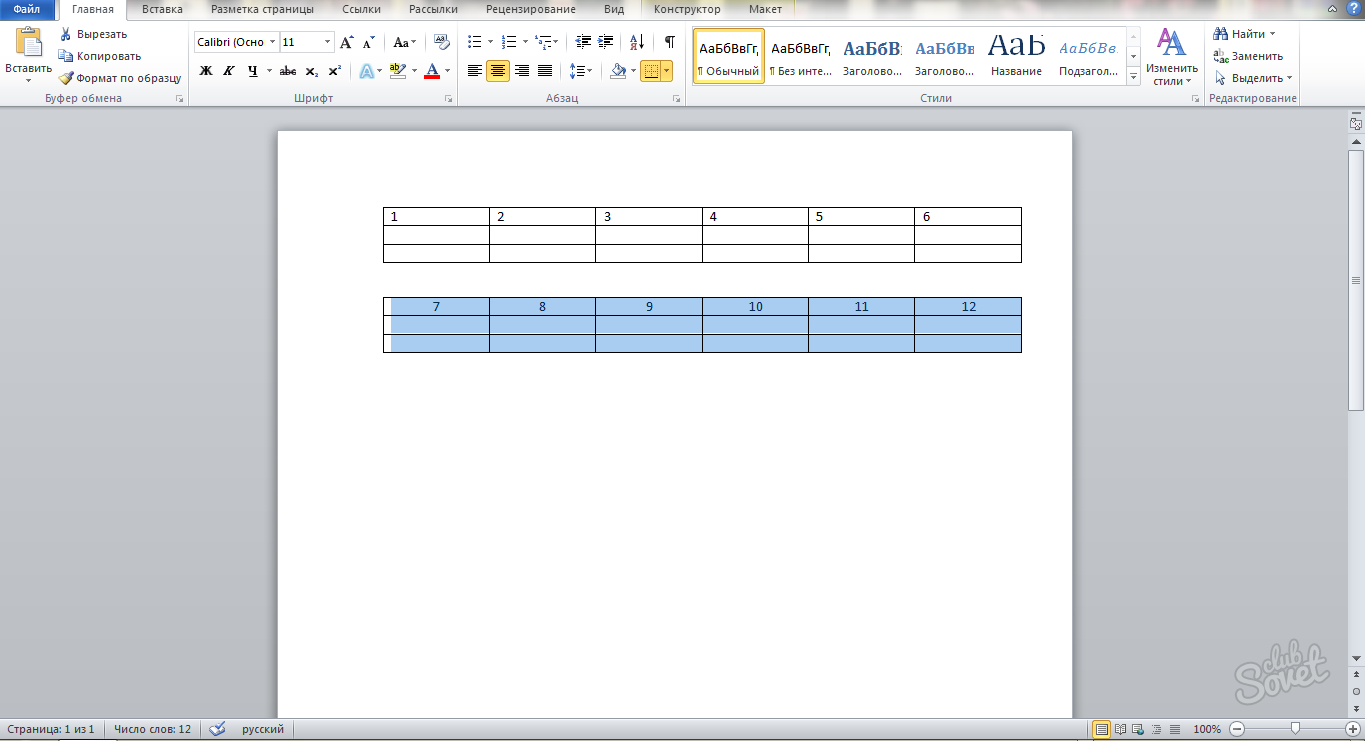
- Highlight the second table completely known to you. Just pull the black arrow along the entire diagonal of the table.
- On your keyboard, click the CTRL + X combination on the English layout or Ctrl + h in Russian.
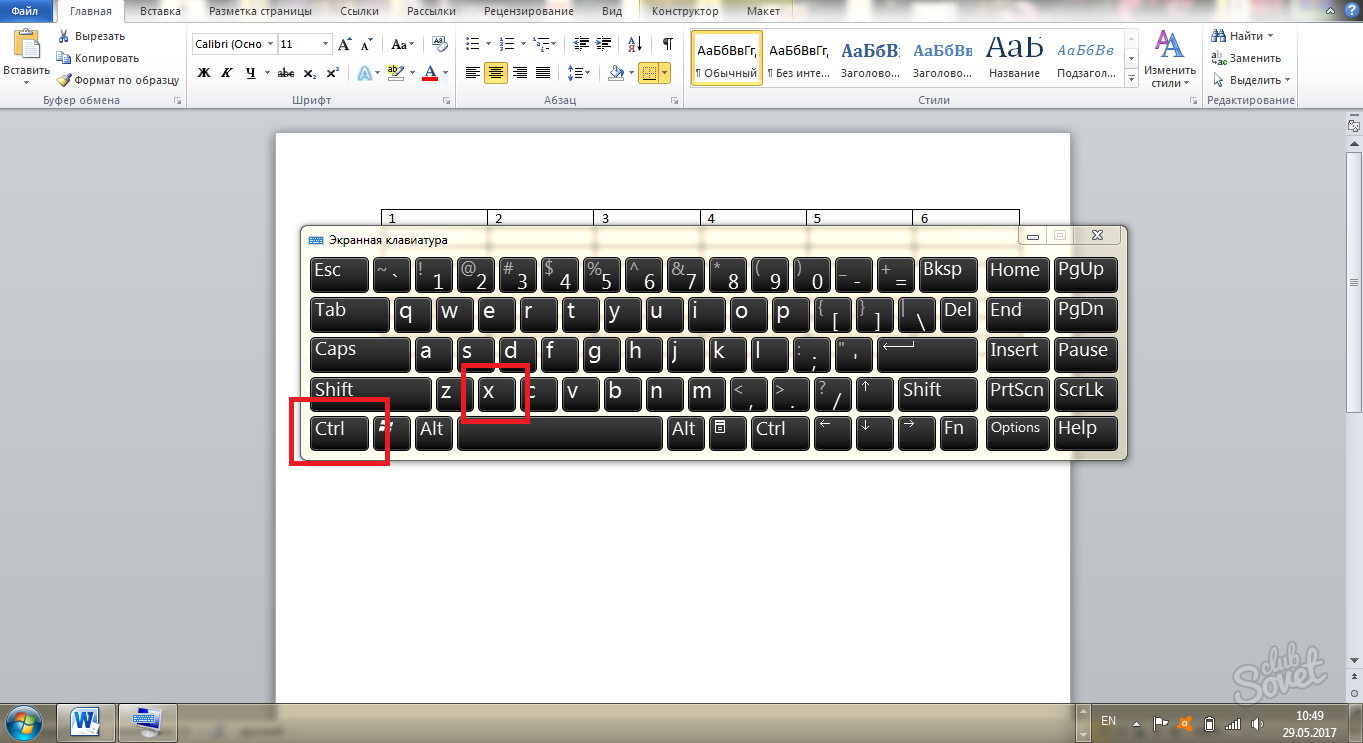
- So you will completely cut the table from the document. She will leave the page and end up in your exchange buffer.
Put the mouse cursor directly under the first table so that it is located immediately on the next line after the table.
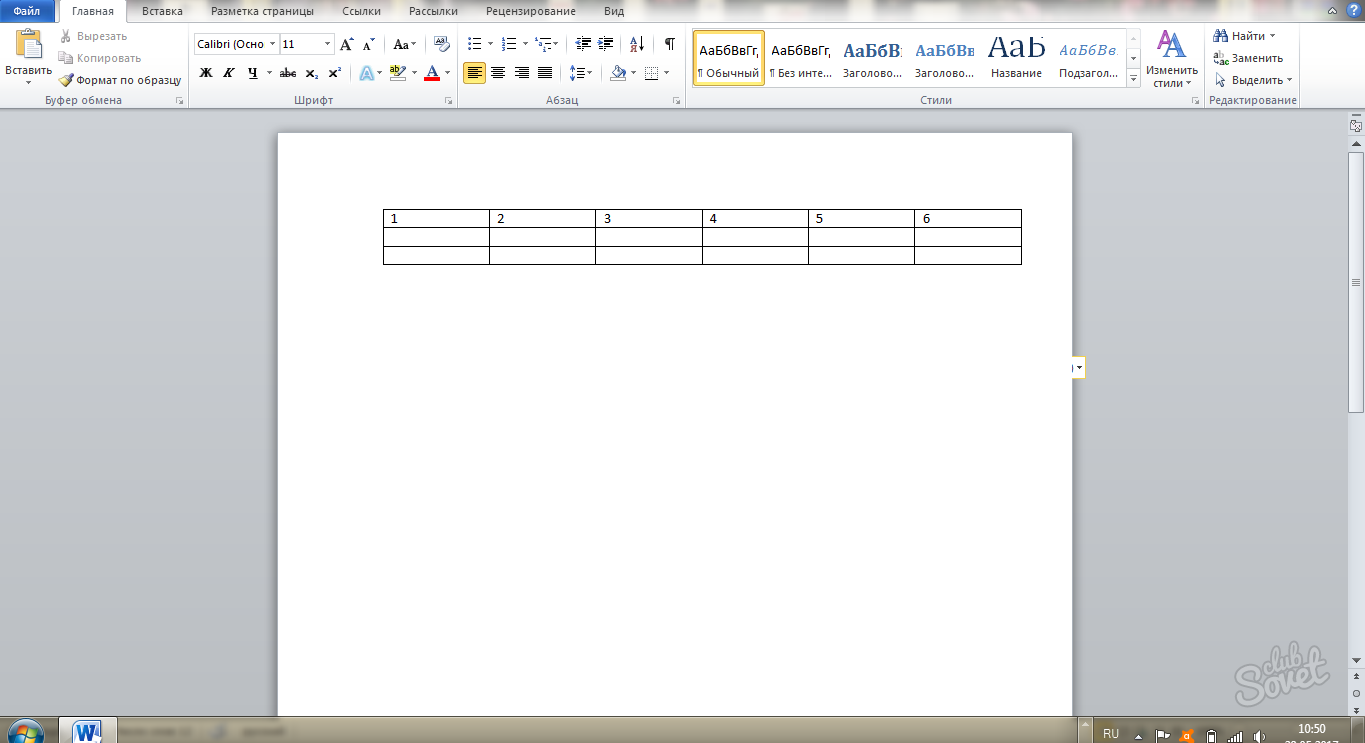
- Pick up on the keyboard a combination of Ctrl + V keys if it is on the English layout and Ctrl + M, if in Russian.
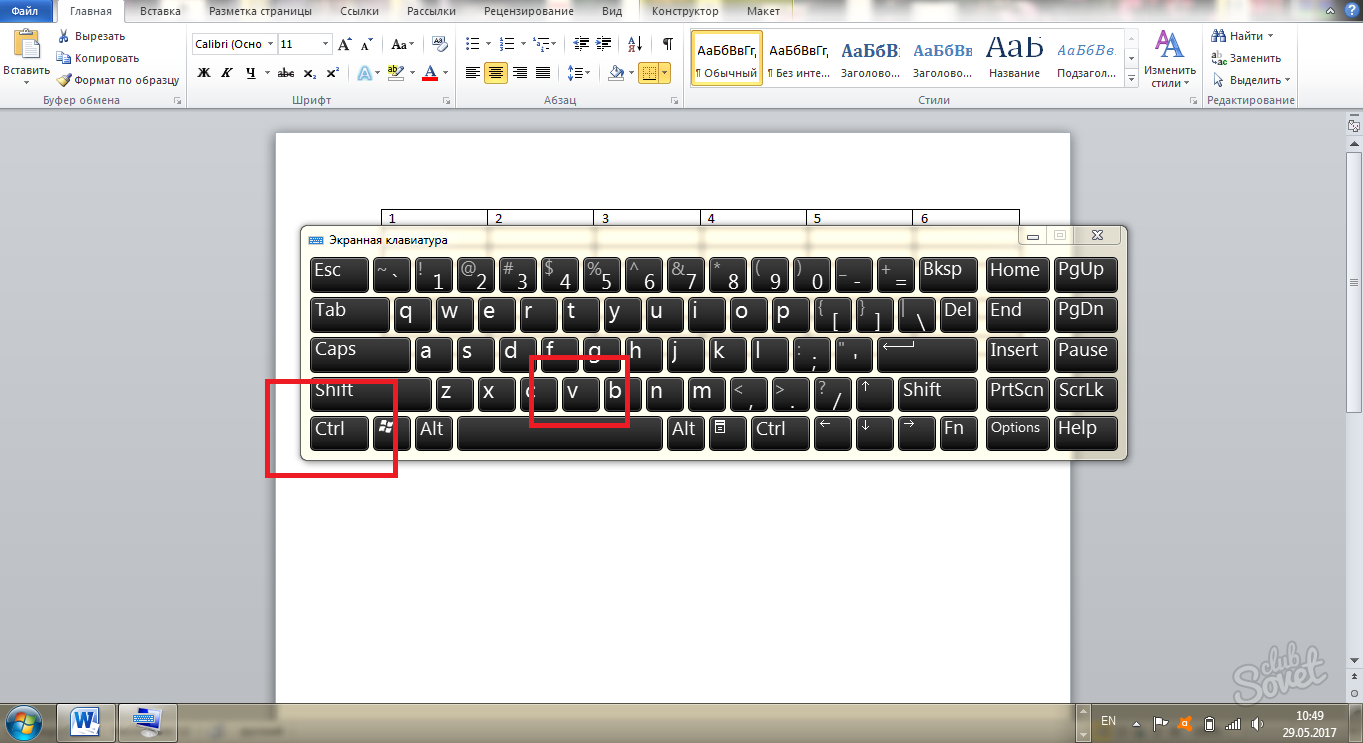
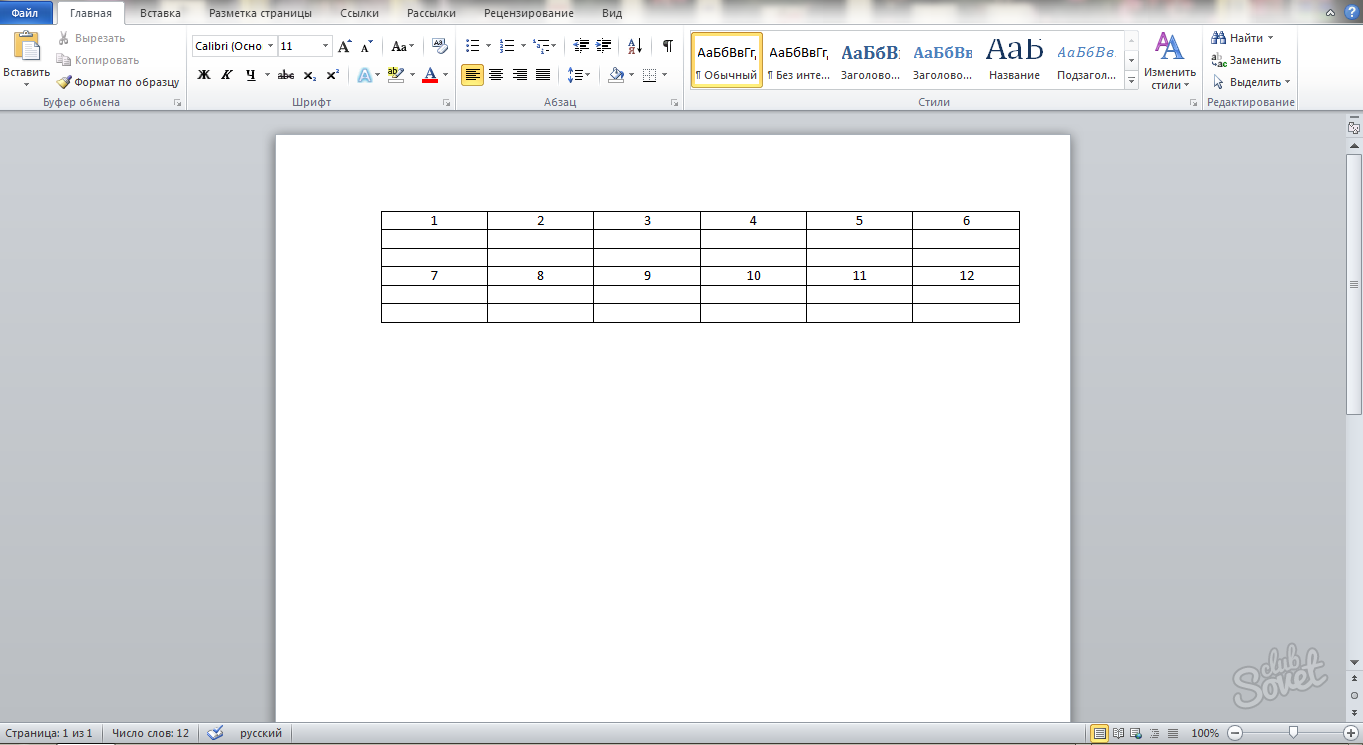
- Look at the result: both tables will unite, while maintaining formatting. There are no extra boundaries between them, and the parties are automatically leveled.

- Now format the elements inside the cells so that the table begins to look more aesthetically pleasing. Select it completely and click on the release of the right mouse button. In the drop -down list, select the “Alignment of the Cells” line, and then select any type of alignment, for example, in the middle.
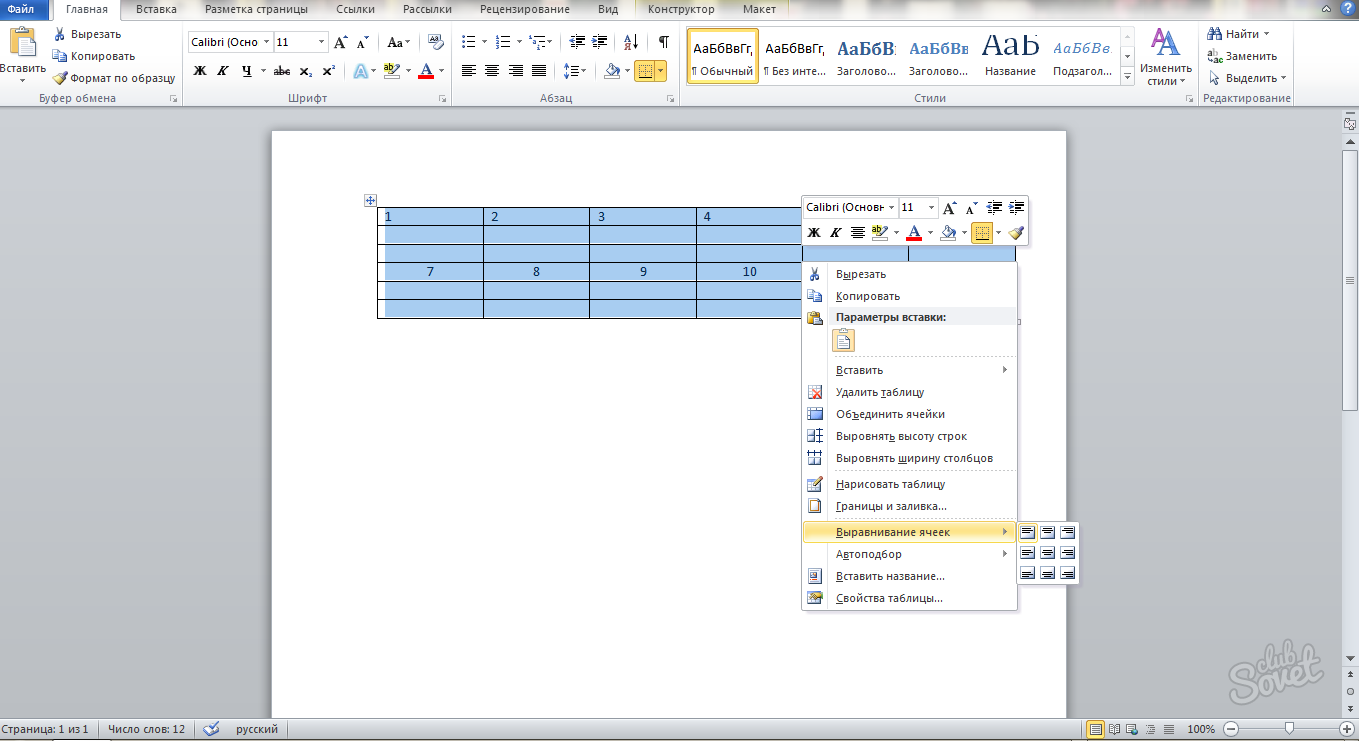
- The text will fall into place, and all the elements will take the same look.
- Use any of these methods to combine any tables in the Microsoft Office Word program. Do not forget that some tables are better to prevail manually and fit in the width. Then the connection will pass faster.


2nd method "TOP"
Thanks
None helped