The Word Text Editor from the MS Office application package is one of the most popular text applications with a wide functionality. In addition to simple text formatting, Word can insert patterns, formulas, create diagrams and tables. At the same time, the developers have tried to make the interface as a clear to the ordinary user, which makes it easy to master all the functions of this text editor.
To create a small table on the Word text editor toolbar, select the command "Table", then - "Draw a table." A window with tools will appear:- choose thickness, type, color lines;
- spend manually using the mouse horizontal and vertical lines according to the developed table layout;
- use additional functions to combine or divide the cells, changes in the direction of text, equalizing the thickness of strings and the width of columns, formatting text, etc.

- this feature allows you to automatically create a table with the required number of rows and columns: Enter the data in the appropriate fields;
- specify the width of the table manually, otherwise the table will automatically take the entire sheet in width;
- change the column width and the height of rows or individual cells, moving the table lines tags on a ruler located around the sheet;
- or select the style of the created table from the existing templates by clicking on the button. «AutoFormat ».
- install the mouse cursor in the table of the table, next to which you need to insert, select a function "Insert" in the tab "Table" and click on the most suitable option;
- select the cells you want to delete, go to the tab "Table" and click "Delete".

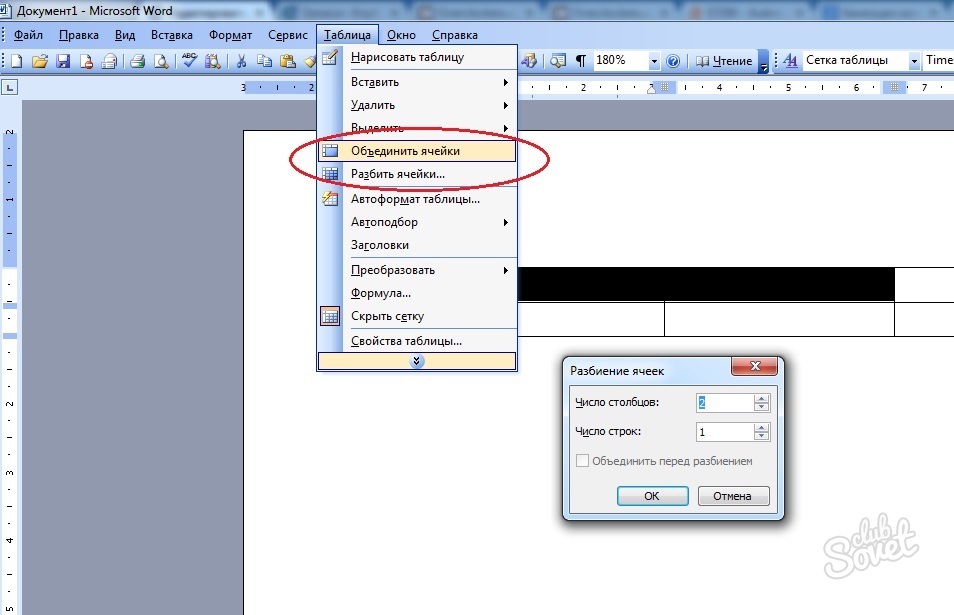
- to combine several cells into one in the created table, select the desired cells, select the function "Combine Cells" in the tab "Table", all cell data are also combinedin the newly created and will be displayed on each other;
- to split one cell to several, set the cursor in this cell and activate the function "Clear cells" in the "Table" tab,in the dialog box that opens, select the required number of columns and rows.
The table is also possible to insert pictures, links, objects using the toolbar in the Word text editor.


