


Tile is the most popular and stylish material for use in the kitchen. This is the most practical solution for the finishing section of the sink, worktop and a stove, as such a fine lining protects the wall from contamination, spray a variety of fluids, water, and fat, as well as being resistant to heat exposure. And, in addition, put an apron in the kitchen with his hands possible, without outside help.
Before the direct laying tiles should choose the right material:- View. You can buy any tile, but it is better to abandon the catchy material bright colors and prefer soft pastel tones.
- The size. Of particular importance, this criterion does not, you can purchase a tile, which you like best. But to lay the tile is more convenient and faster than larger. The most practical material -. One rib side is 10 cm, but if you are interested in is the aesthetic component, for example, you want to lay out the pattern of the tile, its size should be smaller.
- The surface of the tiles. Since the main function of the tile in the kitchen is to protect the walls from the dirt and fat, opt for an apron worth smooth tile. After all, this is easier to clean. But the raised surface delivers greater troubles.
- Stock. Do not forget to purchase the material to take the tiles in reserve in case it is damaged when cutting. Also note the presence of defects in the form of chips and the possibility of incorrect installation. Therefore, the material is usually charged 10% more.

- Tile adhesive is better to take a quality, for example, Ceresit CM11. Despite the fact that it is more expensive than their counterparts, tiles will keep a truly durable.
- Tough mixture take only waterproof. Its color gamut should be harmonized with the picture of the whole kitchen. But to the tile of the fugus is selected in different ways: these substances can and harmonize each other, and contrast.
- Primer composition. The use of primer is not a prerequisite, but recommended to ensure the best adhesion of glue to the wall.
- Remote crossings that are required to separate the tiles when mounting.
To work, you will need such a set of tools: grates for glue, spatulas that have smooth and gear edges, rubber spatulas for grouting, electric drill, which is needed when mixing the adhesive composition, measuring devices, sponges, tiles.

- If there is an old cladding on the walls, it must be deleted. The perforator is used to dismantle ceramic tiles, the metal spatula will be needed to remove the wallpaper. Further, the surface is preparing a metal brush.
- After that, you need to use the bit or ax to apply shallow notches on the walls. 1 meter square - about 200 pcs. This positively affects the ability of glue to fix the tile on the wall.
- Next procedure - surface treatment with penetrating primer composition. Apply primer is recommended for approximately 2 hours before you start laying out the apron in the kitchen.

- At the same time, the future location of furniture and its size should be taken into account.
- Mark on the surface of the border apron, top and bottom.
- The height of the apron is worth choosing, based on the integer number of tiles, so as not to fuse with its trimming.
- Facing tiles should be located slightly lower than the edge of the table top will be.
- For the convenience of mounting the tile at the bottom edge, install a wooden bar or guide. The first row of tiles will be relying on the design. This will help ensure the perfect horizontal of the rows.
- In addition, you can place the surface with additional lines to simplify the adjustment of the conjugation of the tile.


- First it is necessary to stipulate that the installation is carried out in the upward direction. You need to start working with open-angle.
- Take grater on which there are teeth and with its aid type adhesive solution to cover the portion of the wall.
- Apply adhesive to the tile using the same grater and forming a furrow. And can be attached to the surface. At guiding profile must rest its bottom edge.
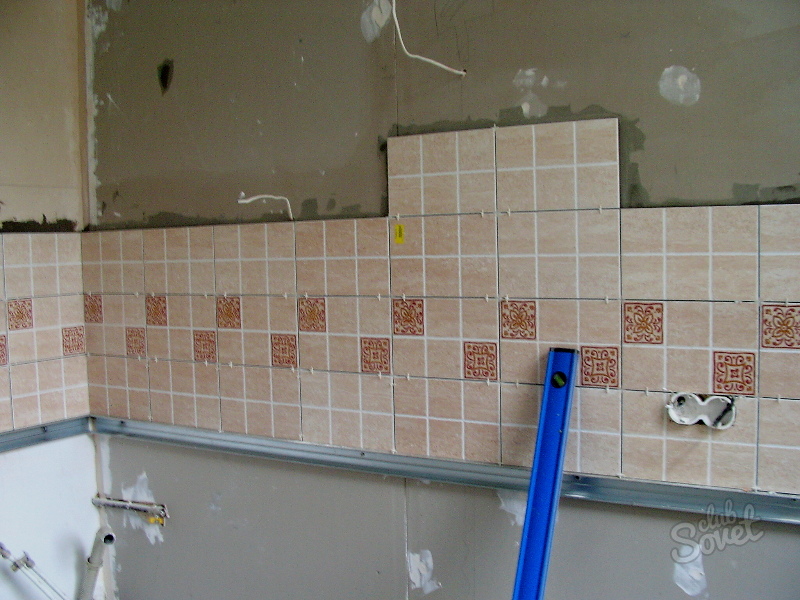
First tile is aligned hands, and then measuring instrument should be used to this. - Place the next item. Remember that between it and the previous tile is necessary to put the remote cross.
- After mounting 8-10 pieces should wipe the surface to remove adhesive residue.
- Continue this action to complete all planned surface lining, do not forget to monitor the horizontal level and the amount of adhesive on the wall.
- After completing the laying of the apron, remove the crosses. Also, do not forget to clean the joints and wipe the entire surface.

After a couple of hours, it is necessary to wash the apron in the kitchen, the protests first the surface of the rigid sponge to remove the traces of the adhesive composition and the fugues, and then clearing the soft rag. To give the cafier gloss used dry flannel. Here, in fact, all!


