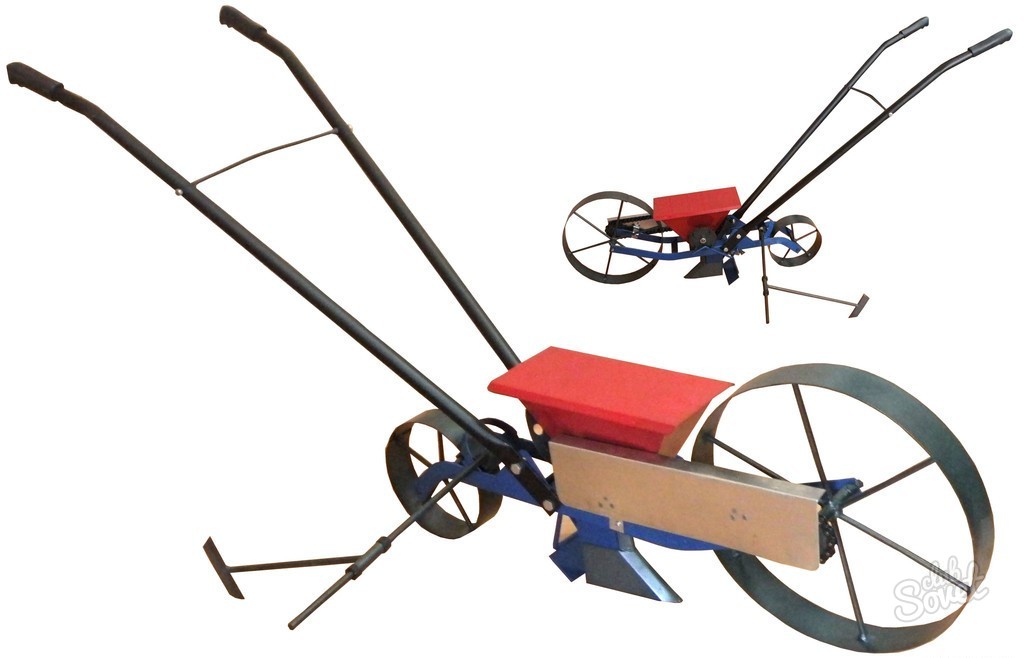
Manual seeders have approximately the same mechanism: it is a spinning sleeve with recesses in which seeds are located. During the movement, these seeds are reset into the furrow, and the sowing density directly depends on the distance between the recesses in the sleeve.
The difference between the seeders is in different ways of feeding seeds. But they all work on the principle of transmitting torque from wheels to the shaft. The shaft must have a deepening, which will serve as seed dispensers, and its upper part adjacent to the container with handouts. The size of the sleeves on the shaft is the largest diameter of the seed, one seed fall into one hole on the shaft. The movement of the wheels of the seeder provokes a dropping of seeds through the holes under the shaft. The furrows are made by plows of small sizes under each row with the same step as the distance between the sowing bushings on the shaft. To make a seeder at home, you will need to choose the materials suitable for design. The simplest mechanism consists of such mandatory components:- Two wheels firmly fixed on one axis.
- Drum (shaft), which performs the role of the dispenser.
- Bunker for seeds.
- A long handle by which the movement movement will be performed - the pusher.

- Cut from a two-minute metallic sheet of two disks, the diameter of each 26 cm.
- On the perimeter of the wheels we make 24 cuts 1 cm depth and bending the petals by 90 degrees.
- In the center of each disk drills the hole under the axis with a diameter of 1 cm.
- Drum: As a dispenser serves an old pulley from the washing machine \u003cVolga\u003e.
- Over the entire length of the pulley, drills for seeds with a pitch of 0.3 cm.
- The depth and width of the recesses should be approximately equal to the size of the seeds, we have 0.2 cm in our drawing.
- Fix the wheels and pulley on one axis.
- From the rod with a diameter of 1.2 cm. Masters handle: From one side, we cut the thread from one side. And we put on the shaft on both sides. The remaining unfinished side of the plate is welded to the nut of the pusher handle nut.
- The seed bunker is soldered out of thin tin and be sure to give it the ears for a strong screw with a pusher with a pusher. To the handle also solder brackets in the form of a triangle, to then pin it with a bunker-dispenser M4 bolts. The lower part of the bunker must be suspended and fit tightly to the pulley. The simplest homemade seeder is ready.

- Drill: Drills 2.5mm and 5mm.
- Joiner's hammer (mall).
- Passatii, and pliers are suitable.
- Transportation, epoxy resin.

- An empty steel pipe up to 5 cm in diameter and a total length is two times less than the length of the future bed. The size of the pipe should not be more than half a meter (50 cm).
- Plastic or wooden rod (rod) is 10-15 cm long. The diameter of the rod take 1 mm less than the diameter of the tube from the inside. You can take the rod as the basis of any material that is good processing.
- Three bearings.
- Wheels with a diameter of 15 to 25 cm: Wheels are suitable from a children's bike or stroller.
- Plastic bunker, you can take a few pieces for the entire length of the pipe.
- A tree bar with a cross section of 7 by 3 cm, a wooden rail, galvanized ribbons from 0.8 to 1.5 cm wide.
- A rod is inserted into the pipe with fixed pre-bearings on it - one in the center, two on the ends of the tube.
- Fix this design on wheels, clamp, we put the markup to drill holes on top on the tube, the holes are planned with the planned distance between the seeds.
- Drill with 2.5 mm drill make a hole in the pipe, choose the bar inside the depth of 2.5 mm, but not more. Rod turn on 45 degrees, choose rejection again. We repeat the action seven times, distributing evenly well on the rod. When necessary, we reduce the landing step, turning the rod to a smaller degree.
- Give the rod drum from the tube and drill holes at the bottom of 5 mm drill, then connect the tube again with a bar.


Thus, you can make a seeder with your own hands for planting radish, carrots, cabbage, beets and other seeds.


