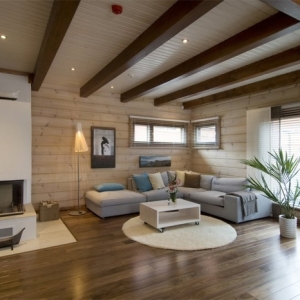
Would you like to place everyday things at hand and in one place? Then you can not do without such a common device like a regiment. On its surfaces, you can add anything - seating in the basement, books in the office or over the years accumulated trash. Most often with your own hands, such an attribute of furniture is made of wood. Consider the most common shapes of the shelves and methods of their manufacture.
Shelves can be classified by appointment: decorative and utilitarian. The first, often made of glass in combination with decorative brackets, have a magnificent aesthetic appearance and give rooms the effect of refinement. The second option is a stronger attribute of the interior, because Made such shelves made of wood, metal or plastic.By type of location, they are two main species:
- Shelves mounted on the wall, incl. Modular type systems.
- Free standing, mobile lockers and shelves.
Designs made of wood withstand heavy loads, they are cheap and uncomplicated in execution. Therefore, consider the method of manufacturing the simplest wooden shelf. This example demonstrates the principle of creating structures of any destination.
- boards of pre-selected dimensions (optimal - 25/130 mm, 3 m long) or chipboard;
- self-tapping screws (16 pcs);
- varnish on wood and brush;
- electrolovka, hacksaw;
- grinding machine or sandpaper of various grainies;
- electric drill;
- screwdriver.

- Attach a ruler with a carbon to the board and make a mark on it.
- Mark 5 elements of 50 cm long each.
- Disposable equal parts for billets with an electrolovka. You can use the saw. In this case, the increased attention is paid to the smoothness of the cut to eliminate the formation of cracks when assembling in penalties.
- Oktrut elements of your product. With low water quality, use the large sandpaper at first, and then go through smaller. Better for finishing to use grinders.
- On the vertical elements, make marking for places for fastening horizontal planks.
- In the center of the end of the shelves, drill holes for fastening elements.
- Collect the product, securing all parts with screws for wood.
Important: Experts do not advise immediately twist the fastening elements too tight. Do it follows after make sure the assembly is correct.

Several tips for proper varnishing wood:
- Before applying the varnish, clean all the surfaces.
- To avoid divorces and tracks from the brushes, dilute the lacquer with the White alcohol. For the first layer, the proportion is 50x50, and 75x25 is suitable for the second (the ratio of the alcohol).
- Cover the shelf with three layers. When forming a tubercles, polish the surface with the abrasive sponge.
For complete drying, the finish layer is usually required two to three days. Now this beautiful and functional attribute of the interior will definitely become a proud homemade master!


