


Garden tracks - an integral element of the design of the indent. When building concrete paths, you can use both purchased and self-made forms to create tiles. As practice shows, self-made stencils are not inferior to non-cheap stores.
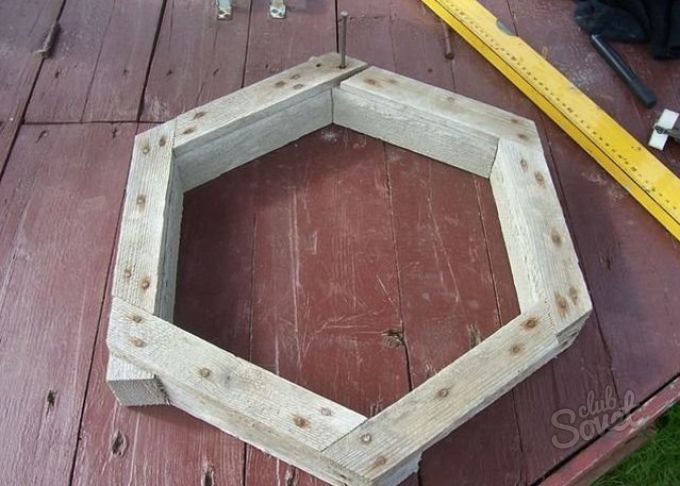
You can easily make a template for the garden tile from the girlfriend, for example, from leaf iron. The galvanized material is cut into strips of the required width and length, the ends of the resulting "ribbons" are bended using a hammer by the type of roofing. Also for the manufacture of tiled shapes will rise by iron hoops, removed from the protruding wooden barrel - it is enough to exacerbate or stretch metal rims at their discretion. Alternatively, the stencil for the tile can be collected from thin wooden plates of suitable size. The plank is folded in the form of a frame, for fastening, metal brackets and screws / screws are used. The tile is cast in such forms right at the location of the track.On a note! The presence of several similar forms will significantly speed up the process of building a concrete path.
- To begin with, wooden / metal stakes are installed on the perimeter of the future trails.
- Then between them stretch the thick wire or the kapron cord.
- Next, from the marked area, they remove the shovel of the turf and deepen the trench by 15-20 cm.
- After that, the bottom of the trench is alternately littered with sand, rubble, geotextile and again sand, formed by the "pillow", are carefully sealing with a manual tamper.

Note! In order to increase the service life of the garden track, the composition of the solution can be supplemented with a reinforcing fiber optic, a plasticizer and a hydrophobic additive - the first one will give the concrete of strength, the second will increase its frost resistance, the third will make the tiled masonry tolerant.

On a note! So that self-made stencils are easily separated from the solution, they are lubricated with machine or by ordinary vegetable oil before pouring them.


On a note! After drying the fixing coating, the tile color may change a little - most likely it will become a grayish-brown. You can give the desired tint path with the help of coloring pigments or acrylic paint - they are added in small amounts to the cooked mortar mixture.

Thanks to the use of self-made forms, a sufficiently tedious and monotonous process of building a garden lane will turn into an exciting and creative event.


