For the amateur, the installation of electrical wiring seems very difficult. It is necessary to know many things so that all the instruments in the apartment worked carelessly, especially since it is about the safety of households. But it is worth studying the subtleties of electrical installation work, learn how to work with the necessary tools and materials, and everything will definitely.
1
The apartment inner wiring can be an open type, closed or combined. It is easiest to install an open wiring - it is mounted on the surface of the walls and ceilings, and the advantages of this method are obvious - if necessary, it is easy to replace or repaired. The disadvantage is also there is an inesthetical look. Such wiring is most often used in wooden houses, when the twisted cable on the insulators or in the cable channels is mounted. In apartments, open wiring is not customary to use, except that we are talking about laying the wiring in the euro cable cable and special electrical circuits.
2
Hidden installation of wiring implies several stages. First of all, it is worth making a circuit that carefully calculated where the instruments are planned. Finding out the approximate power of all devices, it is easy to determine the brand, a metrarix and cross section. It is better to acquire the wiring capable of withstanding a large load of 30% than supposed. Most often two- or three-centered wires (Type of PPV, ATV, ADPV) are used. Also to the desired staging of the wire you need to add 20 centimeters on each site of the installation to facilitate the work. In accordance with the number of sockets, lamps, switchboards acquire junction boxes.
3
Directly mounting work starts with posting installation markup, as well as junction boxes, for which you need a roulette, a marker and cord. By placing where the main wire is laid (from the electrical tailor to the end point of the installation), they mark the switches, sockets. The trunk wire is made to lay under the ceiling at a distance of at least 15 cm, it is carried out by perpendicular lines to the place of installation of switches and sockets.
4
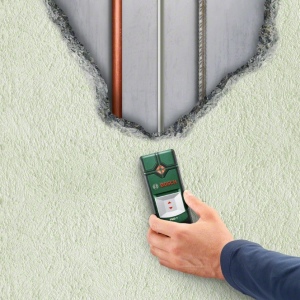
After marking, you can begin the preparation of the ceiling and walls. To mount the sockets and switches, you need to drill holes using a drill and special nozzles, and for wiring - to make grooves using a strokescence or a grinder with a diamond disk. If the wiring is installed under drywall or in the euro-cable cable, the walls are not needed.
5
First pave the wiring, leaving 20 cm on each side to connect switches and sockets, and the furrows are attached. To mount the wiring, you need to install junction boxes in the prepared deepening in the wall and secure them with the plaster mixture. After the plaster dried, you can connect the wires according to the diagram using the scroll method with soldering or using the contact pads. It is important not to forget about the isolation of the connecting places with the help of a tape. For these works, there will be passage (handles must be isolated), cruciform and slotted screwdriver, tape, knife for mounting. The wires are placed in the box, after which it is closed with a lid. After checking the operability of switches and sockets, you can connect the devices to the electrical switch. First of all, you need to learn in the electrical station institutions who have the right to fulfill these works. You can often connect the connection yourself, after which the controlling organization will check the quality of the work performed.
Electrical work requires a careful attitude towards the slightest details, you need to calculate everything and take into account. It is also not worth saving on materials, because the wiring must be sure to serve for many years.
Share advice:"How to conduct wiring in the apartment"