


At first glance, the connection of the IP camera may seem complex and confusing, but this is not entirely fair. Below we will write in detail the entire process of its configuration, on the example of which you will see - this lesson will not take much time. Once you understand the sequence of actions, you can easily do it again.
How to set up an IP camera yourself?
Before proceeding with the settings, we will connect our device to the PC. We use for this a specially squeezed twisted pair (the wire should be included), connecting suitable connectors. Do not forget to screw the antenna into the camera (if it was supplied in a disassembled state), as well as connect it to the 220 network for feeding. If everything is done correctly, a green indicator will light up on the case, and the device itself will make several movements. We are waiting for the camera to stop and proceed to its configuration:
- we turn on the computer (we assume that we have Windows);
- open “Start” and select “All Programs”;
- we go to “standard”, find “execute” (or use Win+R hot keys);
- in the command line, we write “CMD” and send to execute the “OK” button;
- in the console that appears, we collect ipconfig, click “Enter”;
- information related to network connections will be displayed;
- we are looking for the section “Ethernet Adapter Local Area” (connection by local network), look in the line “IPV4-address”;
- record \\ remember the values \u200b\u200bof IP (for example, 192.168.10.222) and the mask-tunes (for example, 255.255.255.0), or do not close the console to contact it again;
- install the software attached to the IP camera from the disk from the kit, or download it from the official site;
- we launch a program for controlling the camera, go into settings, or find in its interface fields for entering the IP / masks of the subnet, which we learned above;
- we collect the mask unchanged;
- We form the IP address on the basis of data with a PC: if the computer is accepted for 192.168.10, then we transfer the first 3 values \u200b\u200bwithout changes, and the latter select arbitrarily (from 1 to 126, excluding the values \u200b\u200balready occupied by previously installed devices);
- we save all the settings made;
- if the camera requests a login and password anywhere, by default they are Admin \\ Admin (or registered in the documentation);
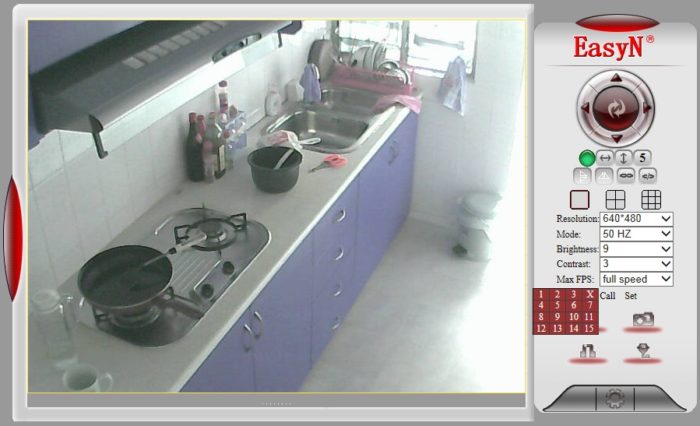
- reboot the camera, click the “Open” button near the “Inner Access” field (on the example of the interface of models from Easyn);
- the camera will try to open through one of the browsers, it is better to choose Internet Explorer, provided for by default developers;
- we click on the settings icon and go into WiFi parameters;
- we scan available networks, select our own and enter the access password;
- if the network is not located, you can try to specify its name manually;
- next, go to the “Network Settings” item and check again, whether IP and mask correspond to those that we indicated above;
- we save all changes, reboot the camera and PC;
- when the devices are turned on, launch Internet Explorer and in its address line we enter the IP cameras in the 192.168.1.121:81 format, where 81 is the port;
- if everything is done correctly, the camera will broadcast the image.
To check and understand how it works, you can look at the world through IP cameras, already configured by enthusiasts of the Dyal of public use.


Thank you very much for your article. For more than six months I could not connect the camera. But it turned out to be only downloaded by Escam software, enter the camera and change the IP address with just one digit. Thank you very much again.