It happens that a hard drive fails or needs to replace a newer. Sometimes there is a need to use it as a digital medium. Both in the first and in the second case, it is necessary to remove it: neatly and competently, so that after installation in place the hard drive can continue to fulfill its functions. Simply put, do not harm! And how to remove the hard drive without damaging it, read on.
1
Before promoting the system unit, the computer must be turned off. Therefore, stop the operating system and turn off the device from the power. Only then can you proceed to the next stage.
2
Now turn off the power supplied directly to the system unit. To do this, transfer the toggle switch (located on the back wall of the computer) to the shutdown position. After that, you can turn off the “uninterrupted” and pull out the power plug.
3
Next, install the system unit in the most convenient position for you, given the specifics of the work. It is necessary to unscrew the wall opposite the one near which the important detail we need is fixed. If you do not orient yourself from which side it is located, remove both walls. Unscrew the screws or open the latches. Remove the side panels and place carefully near the computer. If there is a need, remove all the wires from the back wall of the apparatus, so that they do not interfere.
4
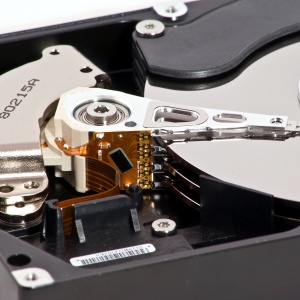
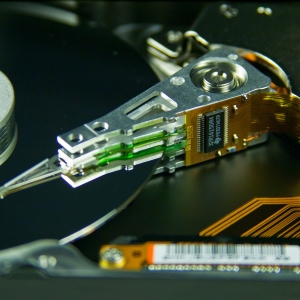
Find a hard drive and pull out two trains from its rear panel (to serve data and for power). If you plan to install it in place, remember the correct position of the train. It is in the same order that they will need to be set back to avoid connecting errors and other problems.
5
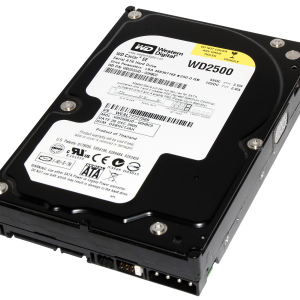
Often the hard drive, like other parts, is attached to the case with metal screws. There may be four of them, everything needs to be removed. Recently, there are models of computers with mini-blocks for a hard drive. As a rule, they are inserted and taken out, sliding along the guides. At this time, you can extract Winchester immediately with a mini-block.
6
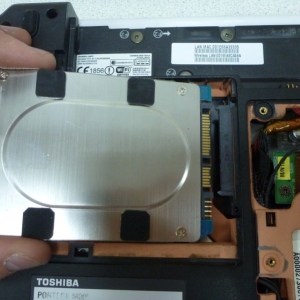
By unscrewing all the necessary bolts, you can remove the hard drive, pulling it towards the rear wall of the computer. That's all, the work is completed. It remains only to install back the panels of the system unit so that the insides do not dust until the repair of the old hard disk or the purchase of a new one will be repaired.
Such a process will not cause any difficulties if you clearly follow the instructions and tips. Even a person who has never seen a computer from the inside will be able to remove the hard drive on his own.