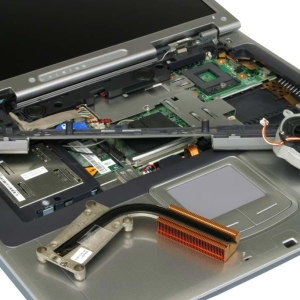
Replacing the matrix on a laptop is a rather complicated process. But if you decide to remove it yourself, try to take it responsibly. Holding to step by step instructions, you can carefully remove the matrix from the laptop and install a new one.
1
Prepare workplace. Please note that you have to shoot a lot of small details that may simply be lost. Therefore, try to prepare a large and smooth work surface. Turn off the computer before replacing the matrix, pull out the battery and pull the cord from the outlet. Remember that some details of laptops may be glued. For example, many spare parts of the products of Apple and Sony fasten with glue. Therefore, before you remove the display from the computer, make sure that it is not glued. Otherwise, you will have to turn to the masters.
2
Before replacing the matrix, purchase a new housing. Specify which model is suitable for you - the rear panel of the screen is a sticker with the number of the desired model. You can also install the AIDA64 utility. It collects data and allows you to find out the number of the matrix you need. On the fastening components of the matrix case are special plugs. Carefully remove them and postpone the plugs aside on the prominent place so that they do not lose. Subsequently, go with all small elements of the computer.
3
Remove the mounting components of the laptop cover. Carefully disconnect the flames of the devices that are inside. Discover keyboard locks and remove it. At the same time, carefully separate the loop from the motherboard. Then remove its top panel. Please note that this item is very fragile, so act carefully to not damage it to the lacaround. During the separation of the matrix, continue to adhere to accuracy - do not break the edges of the computer. Then separate all the screen connection loops to the motherboard.
4
Discover all bolts from the screen shell. Try not to miss any so that there are no difficulties and damage when disconnecting the panel. In some laptops, the bolts can be even on the end of the panel and on the reverse side. If they are there, unscrew them. Then carefully remove the parts of the housing. At the same time, you can use a flat screwdriver to make parts easily.
5
Remember that some laptops are glued along the edges. If your laptop is glued, do not try to pull out the matrix yourself - instead, use the services of a specialist. Otherwise, you can damage not only the old panel, but also the details. Be sure to separate the plume of the connection from the screen - disconnect it from the base. After that, find the inverter - a green chip. It is located between the backlight and the screen. Disconnect the wires that go from the converter.
6
If you want to put a new matrix in the computer, make the work done, only in reverse order and with a new matrix. In order not to glue with your hands on the body and do not leave fat spots on it, dressed fine medical gloves. When installing a new matrix, it is also very careful. Do not press and do not pull the housing - you can break it and the details and without taking advantage of them. After connecting the loops, check the performance of the new screen. Insert the power cord into the outlet and turn on the laptop. If everything is in order, turn off the laptop again and continue the assembly.
You need to change the matrix only if it has completely failed. If the stripes go on the image, it periodically goes out or the brightness is constantly changing, the problem is another. In this case, simply take the laptop to specialists for diagnostics.
Share advice:"How to remove the matrix from a laptop"