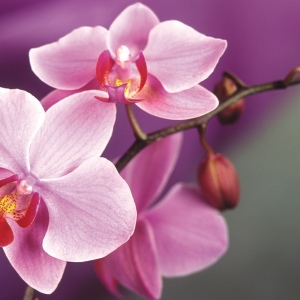
Phalaenopsis is popular among novice orchid lovers. This plant is characterized by simplicity in the content and care. For further development, phalaenopsis must be replant. The transplant procedure is not as complicated, as it seems at first glance. However, it requires compliance with the basic rules.
1
Determine the correct time to transplant phalaenopsis. If you bought orchid recently, start a transplant after it shifts. On average, phalaenopsis must be resettled every 2-3 years. The best season for transplantation is spring. During this period, the orchid begins with active growth and will be able to adapt to new conditions faster.
2
Pick up the right pot. It must be plastic and transparent, with a variety of holes. If the holes are not enough, take a hot nail and do additional holes. The size of the pot must be a little more than the previous pot, if the orchid did not transplanted the year 3. If the orchid had just purchased in the store, you can use the pot of the same size as purchased. The main thing is that the roots are not closely. Space 1-2 cm should remain on the sides of the pot.
3
Choose the right soil. Buy soil in the store or do yourself. The composition of the soil includes: pine bark and moss sphagnum. When choosing a soil in the store, check whether there is a soil. It is best to soil or absent, or was in a small amount. In the composition of the soil, be sure to add charcoal or activated carbon. He will take into himself surplus salts.
4
Disinfect the selected soil. To do this, fill the bark for 30 minutes with boiling water or dried in the oven at a temperature of 70 degrees within 15 minutes. Moss sphagnum hold 5 minutes in boiling water, then press well and dry.
5
Gently get the phalaenopsis from the pot, if there are problems, cut the pot. Do not stand too racking the flower and pull it out of a pot with strength. Place the roots of phalaenopsis in warm water in order to remove the remains of the old soil.
6
Check the root system for rotten or damaged roots. Disinfect the scissors with alcohol and cut off unsuitable roots. If part of the root is spoiled, do not cut the entire root of the whole. Separation places with alcohol or greenflaw, you can sprinkle them with activated carbon. Leave the plant for an hour 2 in order for the sections of the sections dragged.
7
Pour the soil in the pot of 1-2 cm. Position the plant in the pot. If orchid grows in the side, do not try to straighten it, allow natural growth. Put all the empties between the roots. Do not instill aerial roots. Basic roots slightly sprinkle with soil. Check for orchid sit tightly in a pot.
8
After the transplant, wipe the leaves and pot from the mud. Put phalaenopsis into a warm place without drafts. Start watering the phalaenopsis only after 2-3 days. The first 7 days avoid direct sunlight.
Of course, orchids are very beautiful room plants. By purchasing a flower or getting it as a gift, I want this beauty in the house more and more.