Frequently, Apple products simply do not know what to do after purchasing and first launching your iOS device. The first setting is extremely important because directly affects the quality and convenience of using the device in the future. This article is an overview of actions that are needed to configure your phone.
Primary settings
- So, after the greeting screen, the first thing you need to connect to the Wi-Fi network. Enter the password. After connecting the Wi-Fi, we are offered to enable geolocation services or disable them. It is recommended to include this feature for the following reasons:
- This feature will give you the opportunity if the phone loss is easy to find it.
- A huge number of applications work correctly only when the geolocation function is turned on.
- Searching for geromacation enabled is more effectively sorted by our search queries.
- Next, the iPhone settings screen appears. Those who used to use the iPhone or Ai-Pad know how to restore their iTunes or ICloud account. Because we are talking about new phone setup, then we don't have anything to click on "Set up as a new iPhone" and go further.
- Next, we go to the Apple ID menu. This is probably one of the most important steps at the stage of setting up your iPhone, since it is through Apple IDs in the future we will buy applications, music, synchronize different files, etc. Click on "Create Apple ID for Free".
- Next, specify the date of birth. If you are less than 18 years old, you will immediately inform you that you are too young for now to create it. Consider this and specify this date of birth, so that the data entered will correspond to a person over 18.
- Click on the next and us moves to the menu where you need to specify the name and surname. Fill out the form and click on "Next".
- It turns out a window that offers to choose an e-mail. All new users are recommended to choose the option "Get free e-mail in ICloud." In this case, there will be no extra hassle using multiple email addresses.
- Now we offer to choose a name for your mailbox. Enter any name, which is not busy. If the postal name is employed, you will be reported. I confirm our intentions by clicking on "Next".
- The next window will propose to come up with a new password and repeat it. It is advisable to record them and the password that you came up with the creation of an account. If you are then planning to use Apple's technique, they will need you like air.
- Further, to further protect the account, we offer three questions to which we need to write answers. This is done in order that if you still forget the password or you will have your account, you could restore it.
- Then we offer to enter a backup e-mail. Enter your e-mail address to which you usually use.
- Next window - update window. If you want to send various important alerts from Apple to your mail, then we leave the switch green, if not - we turn it off by simply pressing.
- We agree with the terms and conditions. Click on next, we wait a little and everything is ready.

Settings icloud.
- Go to the ICloud settings. In the drop-down menu, select the use of icloud, because without it your device loses the good part of the functional.
- Turn on the function to find the iPhone. She helps to find your phone in case of loss. There is a update of the icloud settings, again we are waiting a little.
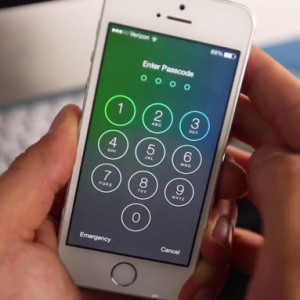
- The next menu in which you automatize will transfer - Creating a password. Create a password to be entered when unlocking the device. In the future it can be turned off.
- Go to the key key icloud. A sufficiently convenient feature that appeared in iOS 7. Despite this, it is not devoid of flaws. In essence, it is a password repository where all your data is stored to access any sites and credit card data. At first, you can choose the item "Set up later." If you are interested in this feature, you can always connect it through the iPhone settings.
- The next item is diagnostics. In essence, Apple requests permission to send reports on the operation of the device so that it is easier for them to track some bugs and device errors. Choosing for you, you want to choose, you want - no. The duration and process of work does not affect.

The main part of the setup is already completed, you go to the main menu of your phone. Almost everything is ready if you need to add some changes or something to correct you can do it yourself, going into the settings and subside them for your needs. Now, when the setting has passed successfully, you can fully use the mobile phone.