When creating a portrait, it is important to accurately depict all the features of the face. The nose occupies the central position on the face, so immediately attracts all the attention to himself. With all the variety of forms and sizes, there are several rules that will help to portray it correctly.
1
Before drawing to drawing, it should be carefully familiar with the anatomy of the nose and its constituents. The most narrow place in the nose - in the area of \u200b\u200bthe nasal bone, that is, in the bridge. The nasal bone of an adult is distinguished by the presence of bulge, sometimes quite noticeable (hubber). There are no such bulges. The widest part is at the location of the wings. If you carefully look at the form - you can see that any nose resembles a little pear.
2
Pay attention to the differences in the structure of the nose in men and women, in adults and children. Most often, men's noses are more massive, and female - softer. The features of the face of women, which means their noses are more smooth, often with severe roundeds due to the presence of more, compared to men, the number of subcutaneous fat. The shape of the baby's nose wings is practically no different from the adult nose. But the child only goes the process of forming a nasal bone, so the noses in children are not only less, but also noticeably shorter and slightly bent up, that is, they curtain.
3
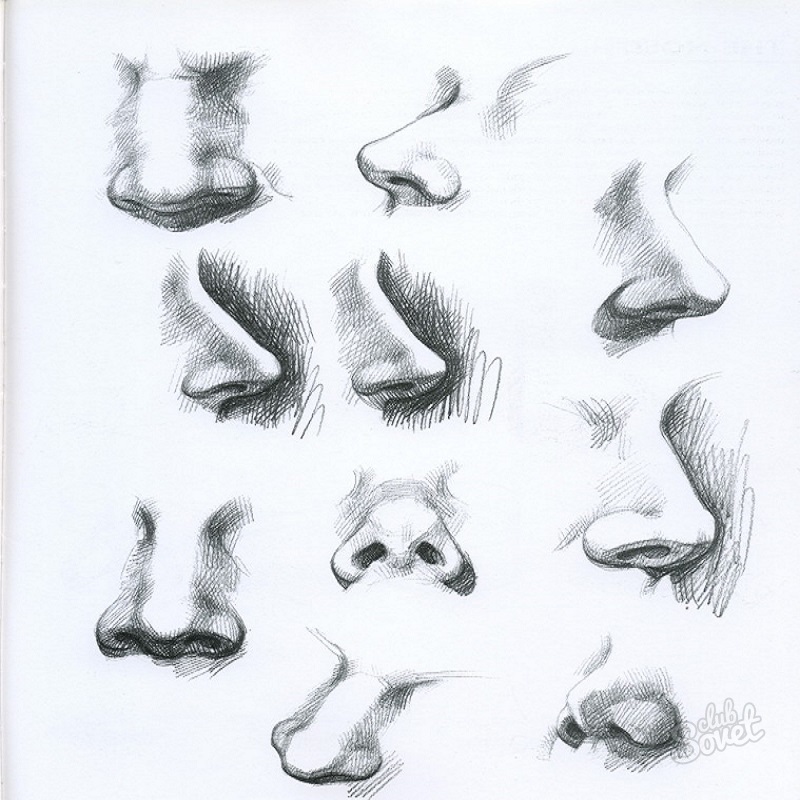
The nose of an adult person necessarily refers to one of the three forms: drunken, straight or with a porridge. It is important to remember that the tip of the rush nose is directed up and located above the wings. If you draw a straight nose, place the tip and nostrils on one line with wings. When drawing a nose with a hubby, it should be noted that its tip is below the wings.
4
We start drawing the nose from the support lines. On the sheet of paper, you will show a circle that will turn into a tip in the future. From the circle to spend up two parallel lines. At the bottom of the circle, we mark the two wings and future nostrils. Now move the horizontal line, separating about a third of the circle - this is the place of the future of the bright area at the tip of the nose. Vertical lines omit to the line Nostrils, we are slightly reduced at the base of the circle. Try not to draw these lines with a large pressure, as the excess lines will wash.
5
Now proceed to the hatching. This will give the volume to your drawing. Strokes are desirable to apply as much as possible to each other, at one corner. After applying the first hatching neatly with the eldcinity erase the auxiliary lines. No need to remove them at all, try simply to mitigate as much as possible. Machine to the second hatching stage, hover the line of nostrils, make contrast shadows.
6
It is much easier to portray the nose of a person with a side, in the profile. To do this, start the drawing is necessary from the same circle denoting the tip, as in the previous method. Now place the second circle, denoting the future of the wing. For drunken nose, the second circle should be slightly lower, for the direct - on the same line, for the nose with the hubber - above the base of the circle. We highlight parts of the circles denoting the tip of the nose and the wing. We draw a loop for nostrils and extend the tip of the nose to the nose.
7
Getting a hatching. We make it in several stages. It is advisable to use pencils of different hardness to give different saturation of strokes. If you want to add a soft picture - use a piece of soft tissue and neatly scroll the touches to get some hassle.
Portrait is one of the most difficult tasks in drawing. But the nose is the simplest part of the person, since it is the only static and almost fixed body. Therefore, learning is better to start with it.