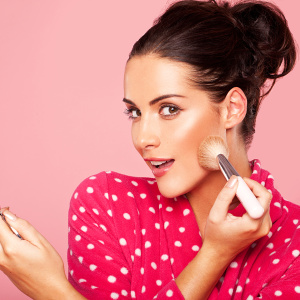
Proofreaders are an integral part of decorative cosmetics. They help disguise inflammatory elements, pigmentation, dark circles under the eyes, coperaz, etc. It is very important to apply the means correctly. Otherwise, even a high-quality corrector can spoil all makeup.
1
To begin with, it is necessary to choose the appropriate form of the release and the color of the corrector. The resulting effect depends on this. After that, you can move to the masking of problem places and applying a corrector for makeup. To do everything as correct as possible, consider step-by-step instructions for applying the corrector.
2
Form of release. Proofreaders are produced in the form of pencils, sticks, tubes, pallet, applicators, etc. The form affects the texture. For example, pencils are the most dense, applicators - soft. You can choose any option, but experts recommend using a fir-fat and soft texture (preferably oil). It is ideal for everyday makeup. Dense consistencies are more suitable for photo, video filming and evening makeup.
3
Colour. There are several shades of the corrector. They can be colored and bodily. Most girls are quite enough bodily corrector, since color are not essentials. If you have easy redness, the body corrector will cope with this problem. Pick the corrector in such a way that it coincides with the color of your skin. Later you can get and color options:
Green shade. Masks red spots and pimples.
Orange or apricot. Hides blue stains under the eyes.
Yellow. Hides a more pronounced blue eyelid.
Blue and purple shade. Paints freckles and pigment spots.
Pink. Eliminates the residual yellowness from the conceded bruise.
White shade. Used to flash dark skin sections.
4
Masking problem places. Remember that liquid correctors are applied to a tonal base, and solid - on top of the main tone. Before applying makeup, wash your hands well, clean your face, apply the cream and let him absorb him. If you use the database of makeup, apply it first. Then put a very few corrector on your finger (the most convenient to use the non-name) or brush and apply it to the problem area of \u200b\u200bthe skin. To disguise pimples, acne and inflammation, use cotton wands so that nonsense does not affect the infection. Color tools apply very neatly and in small quantities, otherwise instead of even tone, spots on the face will turn out. If the defect is too apparent, it is convenient to use a stick - a corrector with a dense texture.
5
Application corrector for makeup. To apply a corrector for makeup, it is recommended to use color to tone or two lighter tone base. It will give the skin more fresh and tightened appearance. Type a small amount of means on your finger and apply it to the inner corner of the eye. Make smooth tapping movements. IMPORTANT DO NOT BE CONSTRACTING ON THE WEEW, but gently apply it and growing it. Gradually go to the bottom century, then apply the tool to the upper moving eyelid.
6
Stretching small details brush. Take the brush, type a few corrector and draw the growth line of the lower eyelashes. Then go through the top century along the growth line of eyelashes. To give the volume of lips, apply a corrector to the upper and lower lip contour. If there are minor flaws on the skin, apply the corrector directly on them. After applying on the skin, the effect of velvet and softness should remain.
7
The final stage. When you apply the tonal base on top of the corrector, do not stretch the skin and smear the tool is not too much, otherwise you will erase it and reduce the entire procedure to not.
As a result, you will get the perfectly smooth skin of the lower eyelid, the upper rolling age, disguise small disadvantages, and also align the overall color of the face. If you are thus applying and cutting a proofer, you will always have neat makeup. Care for yourself and be beautiful!