Carefully landscaping your living space and redeveloped within a limited budget - perhaps. It is enough to familiarize yourself with the basics of work on the construction of the simplest plasterboard structures.
Preparatory stage
We design and plan a room where we construct a separation partition.

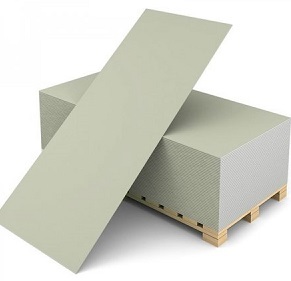
We choose the material of the future object - drywall in sheets (GLC), thickness is 12.5 mm.
A metal profile will be required in the assortment.
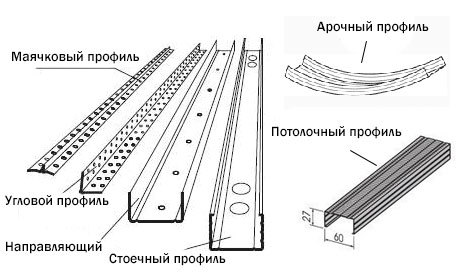
Metal phase standard. Indicator (back / regiment):
- 75 mm / 40 mm - for guide profile ( NP.) and ceiling ( PP);
- 50/75 mm - vertical / rack profile.
Stages of formation of a profile frame built wall
We find out how at the object "ideal" walls and floors, aligning them and check the result by the construction level.

- On the floor marker or chalk black markup for the planned object.
- For the floor we take NP.
- Breeping self-stacked bar back to the floor along marks.
- If the floor is wooden, the short fasteners are suitable (15 mm).
- For concrete - only long self-tapping screws (30 mm) and fix them in a dowel, for strength.
- Installation step - 30 cm.

We glue the back of all guides by mounting ribbon - seal. Compliance with this stage is necessarily. The ribbon will ensure the strength of the fastening of the entire design and will improve the soundproof indicator of the partition.


It remains to install the ceiling profile. We carry out the same manipulations and closure of the outline of the future wall frame.

Montage Glk
Depending on the purpose, the type of GLC should be used, whose characteristics meet the requirements of the core space (moisture-resistant / heat-resistant / thermal insulation, etc.).
- Corrected sheets we screw with the effort by short screws to vertical racks.
- Direction of work - bottom up.
- The optimal step is 15-20 cm.
- Hats of hardware should be recessed completely.
- Fill in a hygroscopic filler (insulator / insulation) an inner piece of plasterboard pie.

- We sew the remaining surface of the sheets of GLC, we work from the wall.
- All sheet joints are carefully put off, we prepare the surface to finishing.

Important! On the future design you can not hang heavy elements of furniture. Elements made of drywall are afraid of moisture. In the way, they perfectly perform their function - the separation of space, the preservation of heat and sound absorption.
(
).