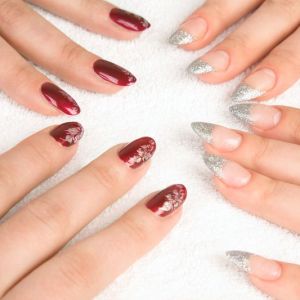
Today go to the salon and make a manicure is not particularly special difficulties. Many masters offer their services even at home or can come to your home. However, some girls prefer to make manicure on their own, without any help. A monophonic coating sooner or later begins to bother, then the question arises: how to draw on the nails?
How to draw on nails - rules
- Try to make design in a calm, habitual setting for you, best in solitude.
- Preferably prepare the necessary materials in advance and decide on the desired pattern.
- Take care of a convenient table and good lighting.

How to draw on nails - brushes
- Point. This brush does not have a pile, at its end there is a ball, most often it is called Dotom. Such a brush you can put commas and points.
- The brush reiakoscience resembles a fan, it draws a divorce. To do this, you need to drop into a palette of several varnishes of different color, then pick them up with a brush and a smooth smear to nail. The result is a divorce that will overlap each other.
- The hairs brush has a length of 2-3 cm and a width of 1-2 mm, designed to draw curved and wavy lines. There are brushes of the same plan, but they have a shorter pile, 7-9 mm, they draw small curls. Such brushes draw all the well-known and long-faced monograms.
- A flat brush has a width of about 4 mm, it is used to draw patterns, for example, Gzheli. For their drawing, you need to dial three varnish different colors on the brush, carry out a wave-like line, resulting in a beautiful unusual smear.
- The petal brush looks like a flat, differs only by its cut corner. It is convenient to draw floral petals.
- Fluffy brush is used to apply sparkle on the nail.
- Thin medium brush has a length of 5 to 8 mm, use it to draw different patterns and drawings: points, lines, patterns.
- Thin short brush has a length of up to 4 mm, designed to draw small parts in the compositions.
- Chinese brush use for a very popular Chinese painting lately. Typically, such brushes are sold in dials, each of them has a different length.

How to draw on the nails of the monogram
- Prepare your marigold to gel lacquer manicure. Apply a base-color-top, do not forget all layers drying under the lamp and seal the tips of your marigolds. Be sure to remove the sticky layer from the top. Some wizards so that the paint fell smoothly and caught anywhere, the top layer of the manicure is neatly baft.
- Now you can proceed to the most difficult. So that your vensellek is careful, you need to score paint on the brush tip to get a bulk drip. It must be transferred to the nail plate and stretch in the right direction.
- All your lines should be like smooth arcs, no corners and straight lines. It is desirable that the patterns are voluminous. To achieve such an effect, some lines need to double, leaving free space between them.
- Monogram demand symmetry, so try to mentally divide your nail in the middle and the patterns made in one half mirroring to repeat into another.
- When you just start learning to draw monograms, you may not have enough fantasy, so take examples from the Internet. When creating compositions, you should not overdo it with the details so as not to drain your marigolds.

How to draw french on nails
- On the nails, apply a transparent protective basis for your gel varnish, do not forget to seal the seal edges of the nails. Base apply a thin layer, dry in an ultraviolet lamp. You can use a camouflage database, or after a regular base, use a light lacquer under Franch.
- A lint-free napkin remove the sticky layer suitably stir up stencils. Free edge Cover with white varnish in one or two layers. After drying, remove the sticky layer from the coating.
- Now you can remove stencils, you need to do it sharply and quickly. If there are some irregularities, correct them with a thin tassel.
- A fixer for gel varnish Cover with a thin layer of nails, dried under the lamp.
- A lint-free napkin remove the sticky residue.

How to draw on the nails of roses on wet
- Prepare your nails to the manicure, apply the background gel lacquer, winning white and black colors win.
- If you plan on all the nails to draw roses, then you need to work individually with each marigold. However, such a design may be too naryapic, two marigolds will be enough.
- On those fingers where you plan to draw roses, apply another layer of background varnish, but not fat so that there are no chasters. You do not need to dry.
- By wet lacquer, paint the semi-closed short strokes schematic small roses, leave some distance between them.
- Give the lacise a little sprawling, dry everything under the lamp. You can overlap the colors to stained translucent varnish. Its not necessarily buy, you can mix a bright gel varnish with the base.
- Cover the finished manicure with a thin layer of top, dry under the lamp, take a sticky layer in a few minutes.

We offered you simple variants of drawings on the nails that do not require a lot of time on execution. Despite this, they are of great popularity among girls and look very attractive.


