Ombre is a gradient effect, a smooth flow of one color to another. On the nails make manicure Ombre, using two or more colors of varnish on the basis of color stretching. He visually lengthens his marigold and looks impressive.
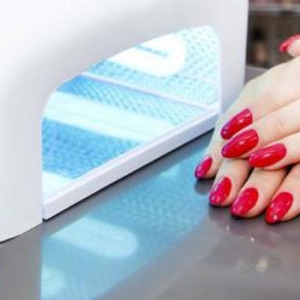
Set of tools for Ombre
Gradient manicure can be made on natural nails. You will need:
- sponge for manicure or ordinary dishwarm;
- lucky - transparent, light and 2-3 different shades;
- foil or unnecessary CD;
- cotton sponges, sticks;
- solution for removing varnish.
If you decide to use the hubby sponge, pre-put it on small pieces, thoroughly rinse from dust and dry.

Types of gradient manicure
There are 5 types of manicure with metamorphoses of colors:
- Horizontal from light tone to the dark.
- Horizontal gradient between contrasting colors. For example, the transition from orange to green.
- Vertical different tones.
- Vertical with shifting colors from the nail of the thumb to the little finger.
- French manicure Ombre.

How to pick up colors
The gradient manicure involves the use of two or three shades, but sometimes their number comes up to six. Before proceeding to creating ombre on the nails, pick up the colors of varnishes. Take advantage of the color palettes, schemes and tables of combinations. If it is difficult for you to imagine how shades on the marigold will look like, refer to online color selection services.

How to make manicure ombre varnish
The main tool for creating a gradient transition is a sponge. You can put lacquer on it, on a foil or nails depending on the manicure technique. Remove the cuticle, treat your nails with a sawmill and cover with colorless varnish, and then proceed to the creation of ombre.
Sponge - Basis for varnish
The first technique implies the application of varnish directly to the surface of the sponge. Procedure:
- Apply the varnishes of selected colors on the sponge in the desired order.
- After a few seconds, make a sponge of a piece of paper to prevent the appearance of bubbles, and press to the nail.
- If the border between the colors is clear, attach a sponge again. Repeat until the result does not suit you.
- Cover nail with transparent varnish.

Ombre using foil
Instead of foil, you can take a CD or glossy paper. Nakov's application sequence:
- Apply varnishes on foil horizontal or vertical stripes.
- Attach the sponge to the coating, and then to the nail.
- Complete the design of a colorless coating.

Sponge for design on the surface of the nail
The difference between the method from others is that the varnishes are applied to the nail plate. Sequencing:
- Cover nail 2-3 varnish colors.
- While the varnishes did not thicken, press the sponge to the nail plate. Do not move it up or down so as not to shift the border.
- After a couple of seconds, a sponge take away from the nail.
- Repeat the procedure on each finger.
- Complete the manicure by applying the final colorless coating.

helpful hints
Making a manicure of Ombre, it is impossible not to wrap the cuticle and the skin around the nails. But if you stick a scotch strips or apply fat to the skin, it will remain clean after the procedure. To avoid the formation of bubbles, use fine-grained cosmetic sponges and make the first prints on paper. To smooth the gradient transition, apply varnishes in several layers.

Do not be afraid to experiment with color combinations and leave enough time to dry the layers of varnish. Then the manicure will succeed in modern and will delight.